Given the scarcity of flour on the shelves during the UK's 2020 COVID-19 lockdown, it was obvious I wasn't the only one to have taken up baking.
In usual times, I'd nip to the local shop on my lunch break and pick up a beautiful loaf of sourdough from one of their local suppliers, Pistrina, Pullins or The Oven.
Since I wasn't going to the office anymore, I wasn't picking up fresh bread, and to put it simply, I missed it.
I'm no stranger to the kitchen. I cook often and consider myself fairly competent when it comes to putting nutritious and flavoursome food on the table – but I've never really dabbled in serious baking. Sure, I've followed the odd recipe for cakes, yeasted bread-machine breads and pizza dough, but I never really took the time to "get in" to baking like I did some of my other obsessions hobbies.
What is sourdough?
Despite enjoying sourdough frequently for a number of years, I never really knew much about it, what the name meant nor how it worked. I had this vague notion that you needed a "starter", a mystical process which probably included offering a ritualistic sacrifice to the sourdough deity, but that was about it.
I now know that conventional bread is made by combining dried or active yeast with the rest of the ingredients. The yeast feeds on the other ingredients in the dough, and as a by-product creates gases. The little pockets of air inside bread are created by these expanding gases, and that's what makes bread light an airy, rather than being a dense block.
Sourdough is basically the same, except imagine you can't get hold of "yeast" as an individual ingredient. What if, first, you capture some wild yeasts, feed them flour and water until they have multiplied, and then add this yeasty, floury, watery mess to your dough? Sounds crazy, but that's literally it. There are yeasts just kicking around in the air and on flour, and if you give them the right conditions they'll thrive! Before we had the processes to obtain conventional yeasts, all bread was made this way.
So this yesty, floury, watery mess is known as "starter" or "levain" – and because it has been fermenting, it smells and tastes sour. This levain takes longer to feed on your other ingredients than conventional yeast, and so the process takes a lot longer. This combination of a sour ingredient, plus a longer fermentation results in a sour tasting bread, hence the name sourdough.
Demystifying starter
If you ask the internet how to make a sourdough starter, you'll be overwhelmed with the amount of differing, often conflicting advice – at least, I was. Plus, recipe websites in 2020 are hell. No, I don't want you to notify me. No, I don't want to subscribe to your mailing list. No, I don't want to hear your life story. No, I don't consent to all the third-party tracking cookies you want to put on my device. Just show me the recipe!!
In the end I went for this one, as it seemed the most straightforward. In their words:
No expensive heirloom starters, mashed-up grapes, or mysterious rituals required — just flour, water, and a little bit of patience.
This recipe is non-strict about the flour you use. I used plain flour (aka. all-purpose flour).
Essentially you combine equal amounts (by weight – ignore all of the by volume US measurements) of flour and water, adding the same amount again each day, until you have an active starter. For me, this took about 5 days. I kept it on the window sill in my kitchen where the ambient temperature was around 20°C (temperature is just one of the variables that will affect the rate at which your yeasts multiply).
I kept mine in an oversized Kilner jar, because I didn't know how much it would increase in volume. Better to have too much room than have it spill out over the sides! It doesn't really want to be airtight, as the gasses ideally need to escape, but you should cover it to prevent it drying out and getting contaminated.
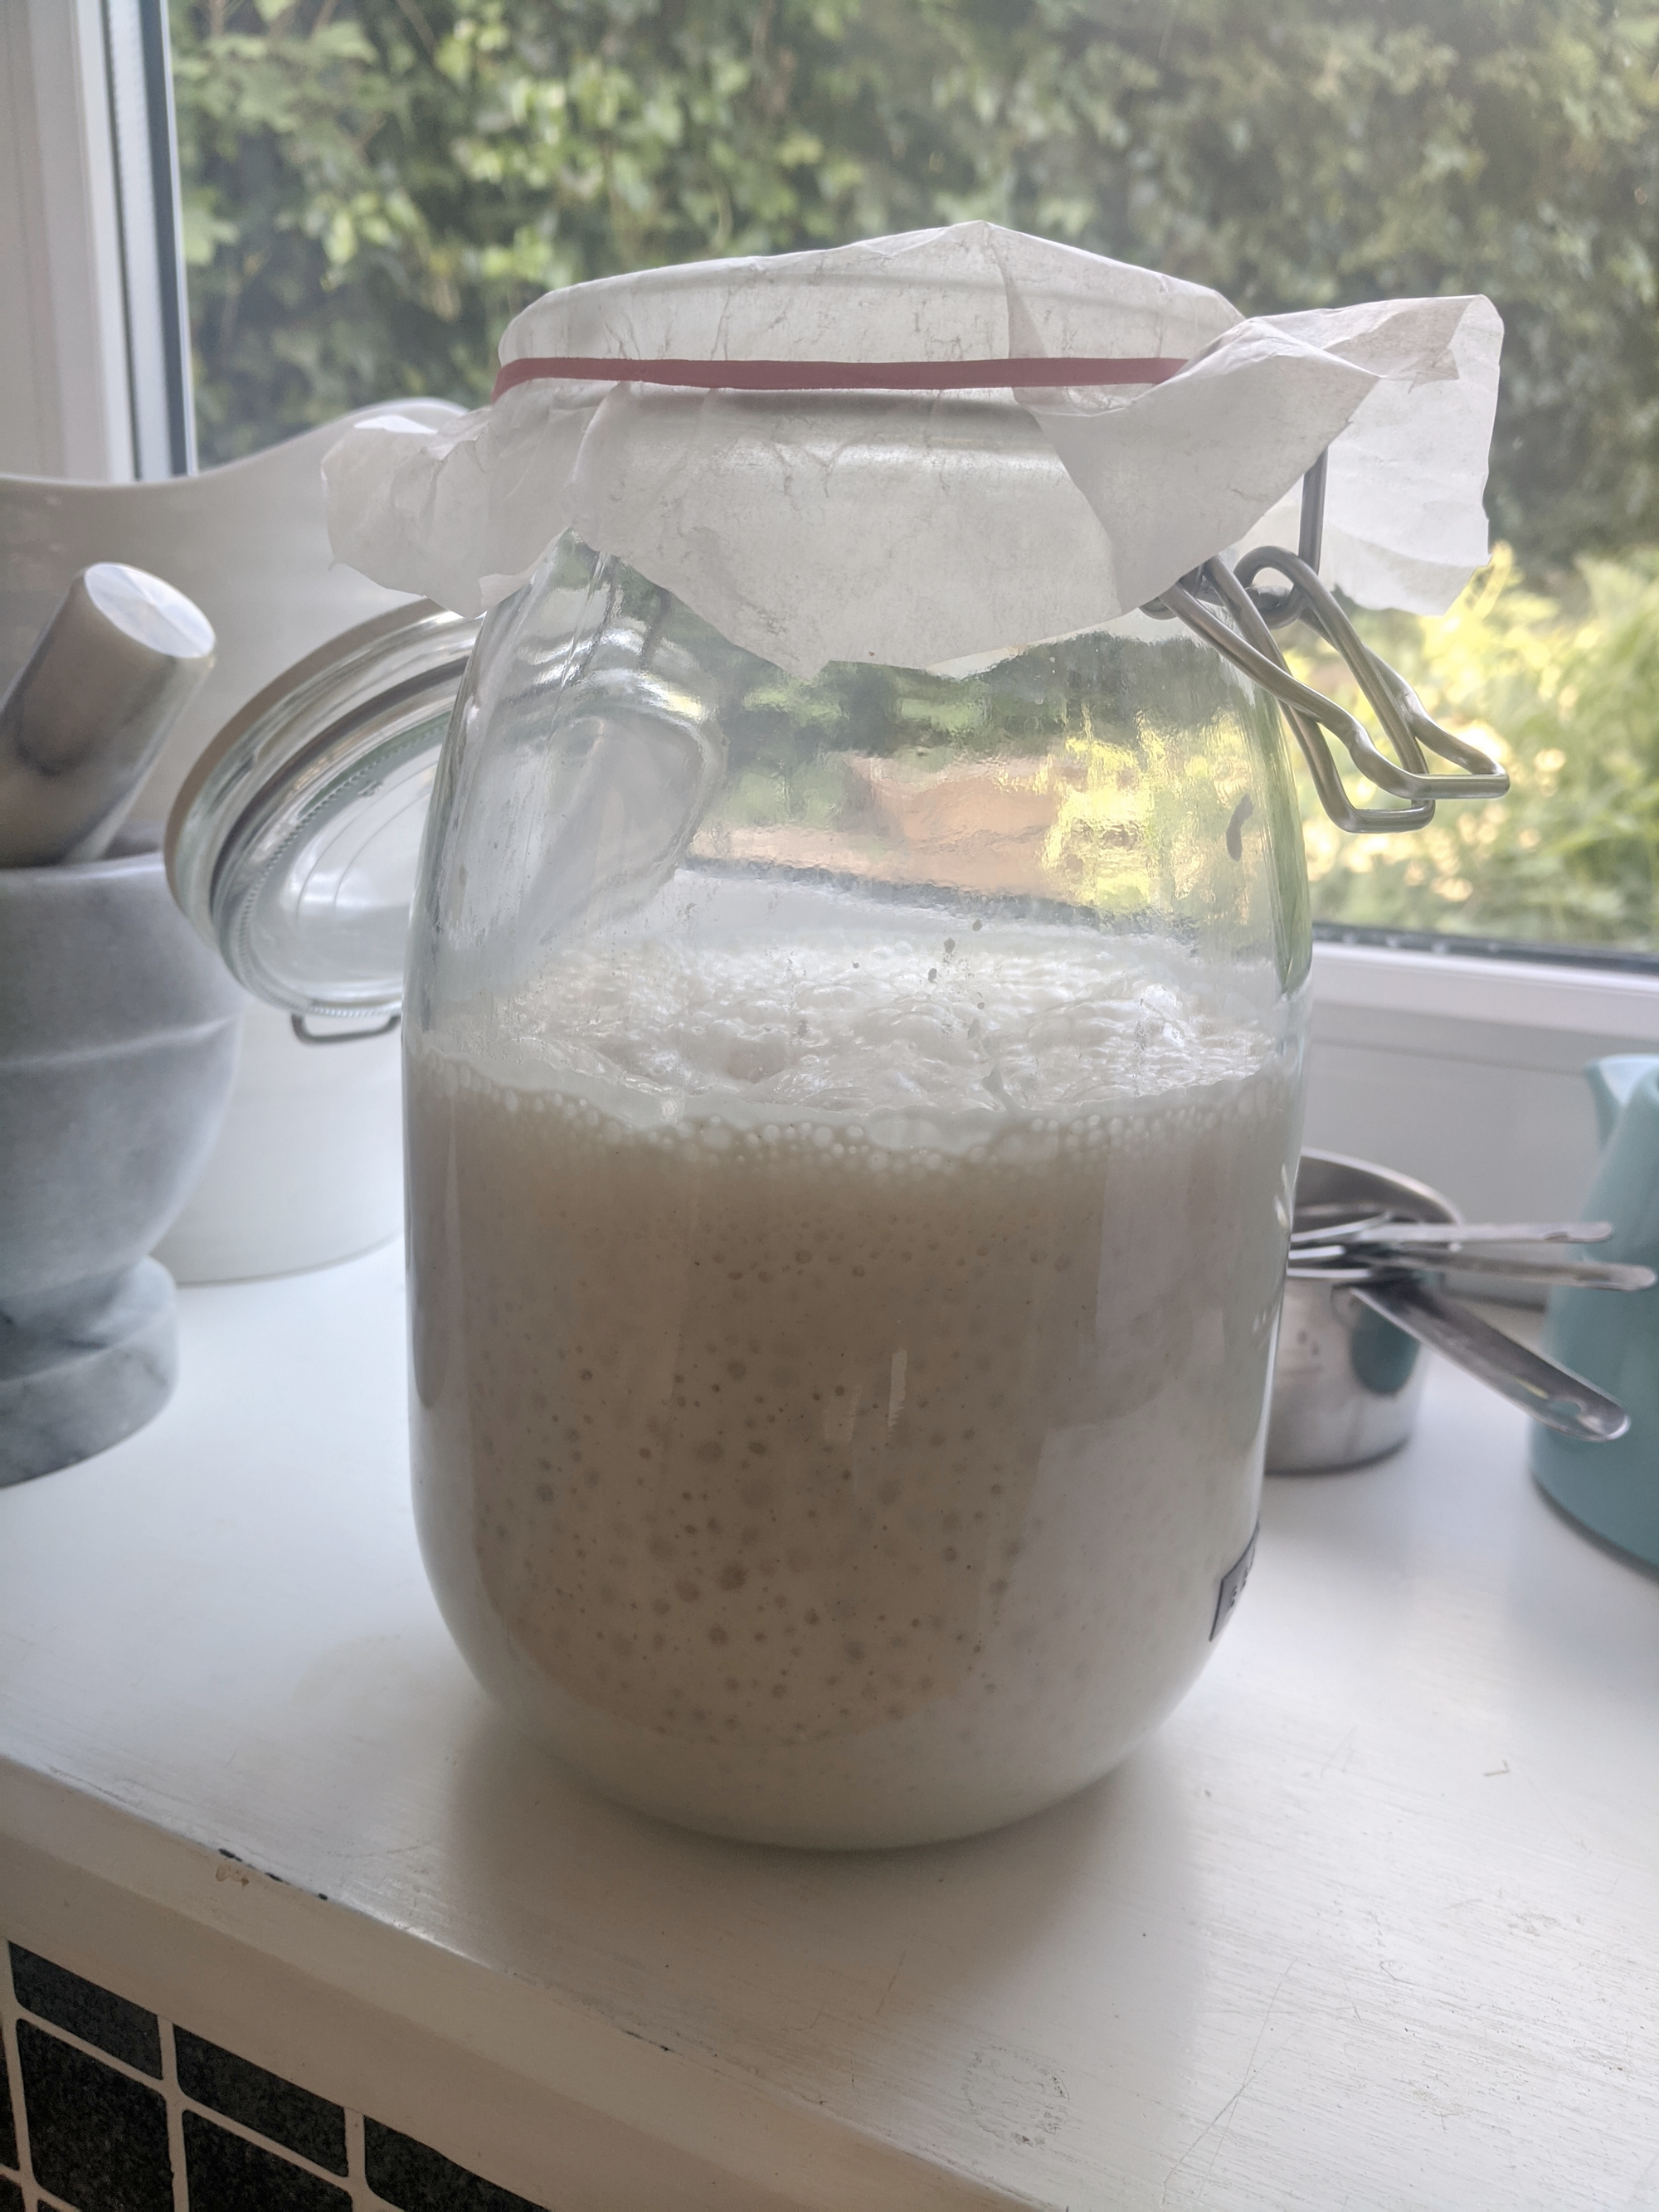
You'll have a lot, which is a good thing to start with, but once you've developed a healthy starter you'll want to start discarding. I'll come back to my starter later to tell you what my feeding schedule is now.
First attempt
Like my starter, in a world where I basically have no idea what I'm doing, I like to keep things simple, in the vague hope of reducing the number of things that can go wrong.
I opted for this recipe by Patrick Ryan. There's actually a slightly different variation of it on Youtube ¹ – I went with the BBC one first.
Having subsequently moved on to more complicated and lengthy processes, what I love about Ryan's recipe here is that he keeps it really simple and also quite short – by having quite a high ratio of starter in the recipe, the fermentation happens pretty quickly, and you can do this recipe from start to finish in about 6 hours. He also shows you how to use equipment you already have at home, rather than any special baking equipment.
For a first attempt, the fact it wasn't an absolute disaster was incredibly rewarding. A testament to the recipe, no doubt, rather than my culinary forté.
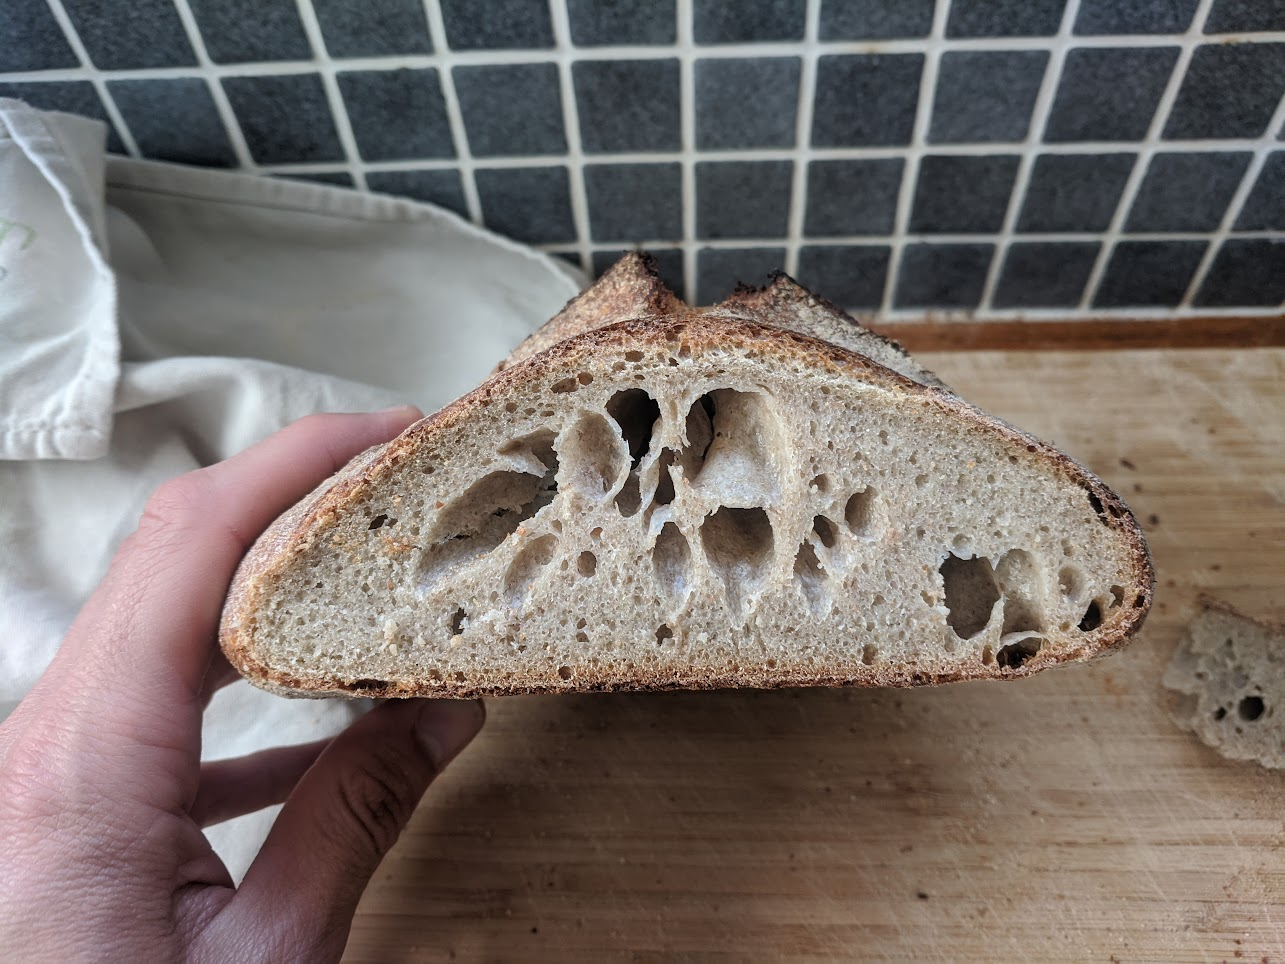
It tasted good! A dark and crunchy crust complemented by a fluffy, buttery and slighty tangy interior. But it didn't look like the sourdough I was buying in the shops, with the really airy interior, with a glossy sheen – an open and moist crumb. Why? The pursuit of an answer to this question is, I suppose in hindsight, when this tipped over from a casual "oh I'll try making some sourdough" to a veritable obsession.
Experimenting
After repeating the Patrick Ryan recipe a few more times, I felt ready to move on to something more advanced.
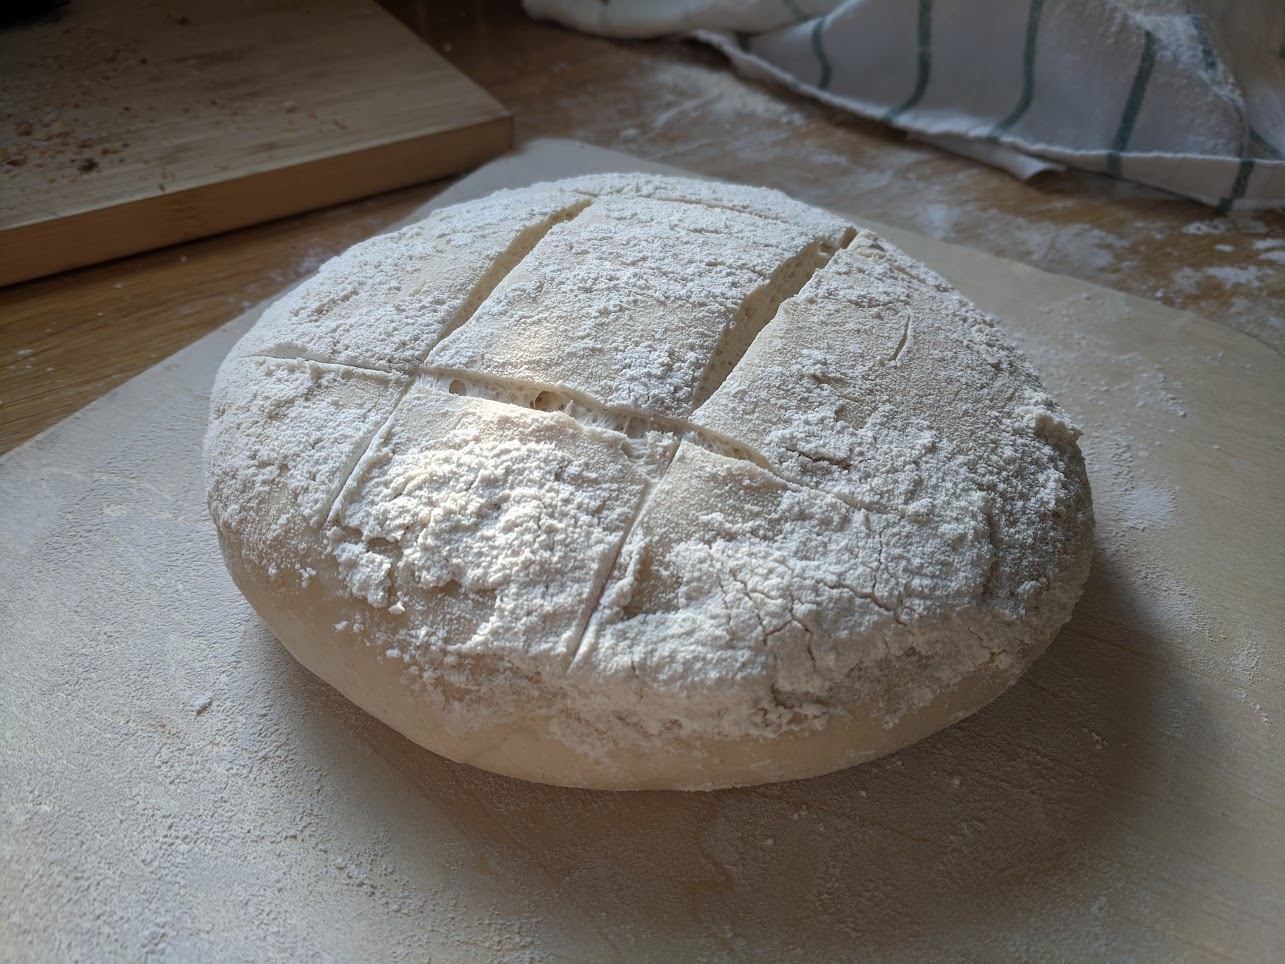
One problem I started facing repeatedly, with that recipe and the next – and which somehow I managed to avoid first time around (a healthy dose of beginners' luck?) – was my dough sticking to the floured tea towel it was sitting in to proof. I switched from proofing in a bowl to proofing in a colander – the theory is the perforated surface allows moisture to escape, where as a solid surface encourages moisture to condense and allow the dough to bind to the cloth. I also milled some rice in the nutri bullet as the internet marvels at the non-stick properties of rice flour. This double pronged approach seemed to fix things, but in the mean time I ordered some bannetons, so I now proof everything in bannetons without any stickage issues.
The next recipe I tried was this Table Loaf by Sarah Owens.
This recipe introduced few new concepts:
- building a levain
- an autolyse(ish) step
- stretching and folding (instead of kneading)
- overnight proofing / retarded fermentation
- dutch oven / cast iron casserole pot
Building a levain
I found differentiating the terms starter and levain so confusing. If 2020 me could read this explanation, I'm sure he'd be delighted:
- There is no technical difference between a starter and a levain: both contain water, flour and a population of wild yeasts
- The different name denotes the purpose of the mixture
- Starter is something you keep around forever, feeding it, discarding portions of it, feeding it again. You don't put the starter directly into your recipe¹.
- When you take a portion of your starter to begin a recipe, feed it specific amount of flour and water, according to what the recipe calls for, and leave it to "ripen" – this is a levain. After something like 8-14 hours, your levain is "ripe" and ready to start your recipe with. You use the entire thing – but if you did this with your starter, you'd have none left.
¹ Except if you are Patrick Ryan, trying not to confuse new bakers – he skips the building a levain part and just wacks a load of starter in.
Autolyse
An autolyse step is a fancy name for letting a mixture of flour and water sit for a period of time from say 30 minutes, up to multiple hours. Its purpose is for the water to fully hydrate the flour which causes the gluten to develop. You can do this manually, which is quicker – it happens when you knead. But, if I understand correctly, the less you handle the sourdough, the lighter and open your crumb will be.
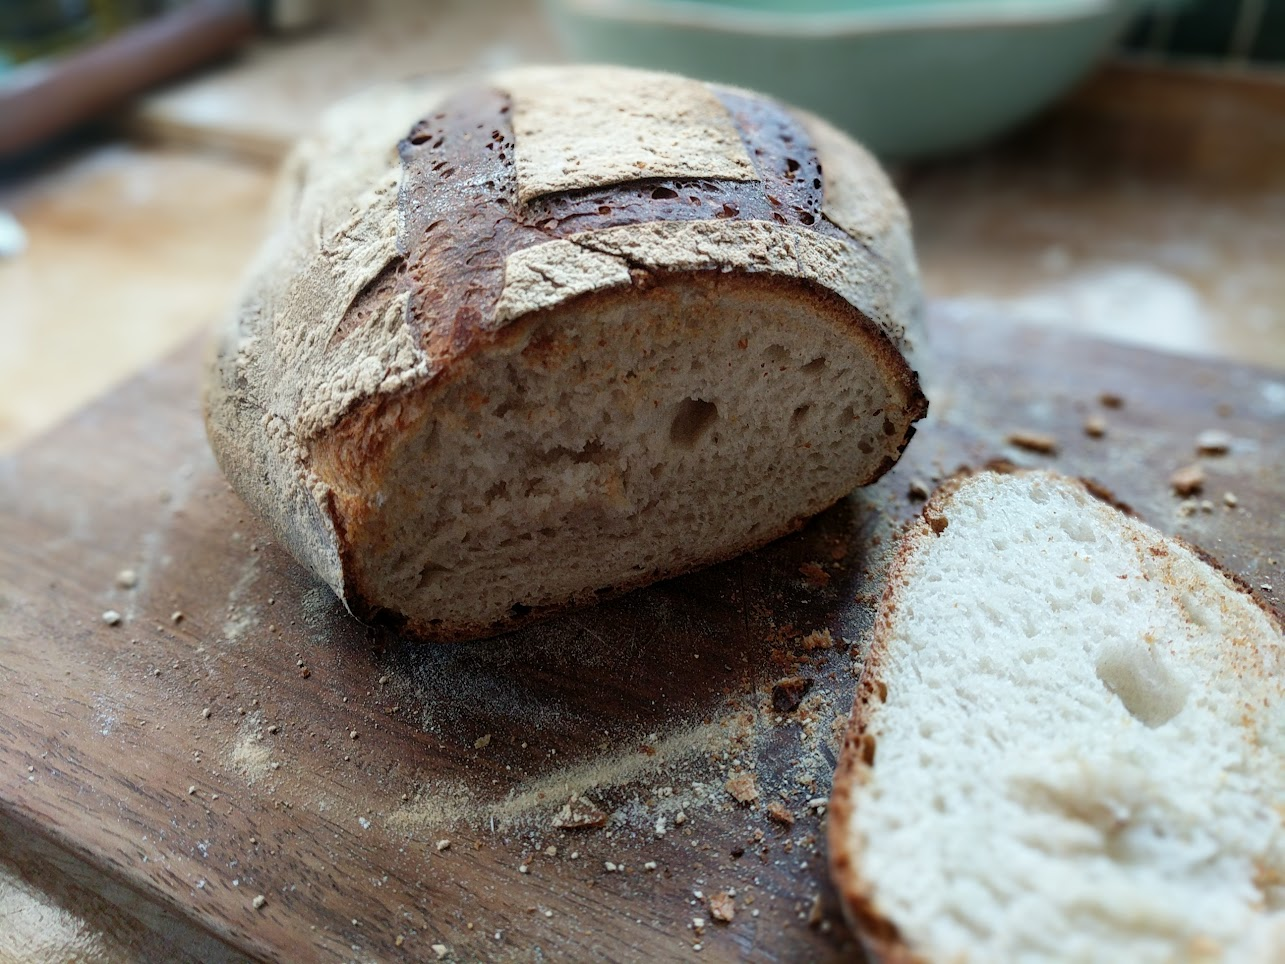
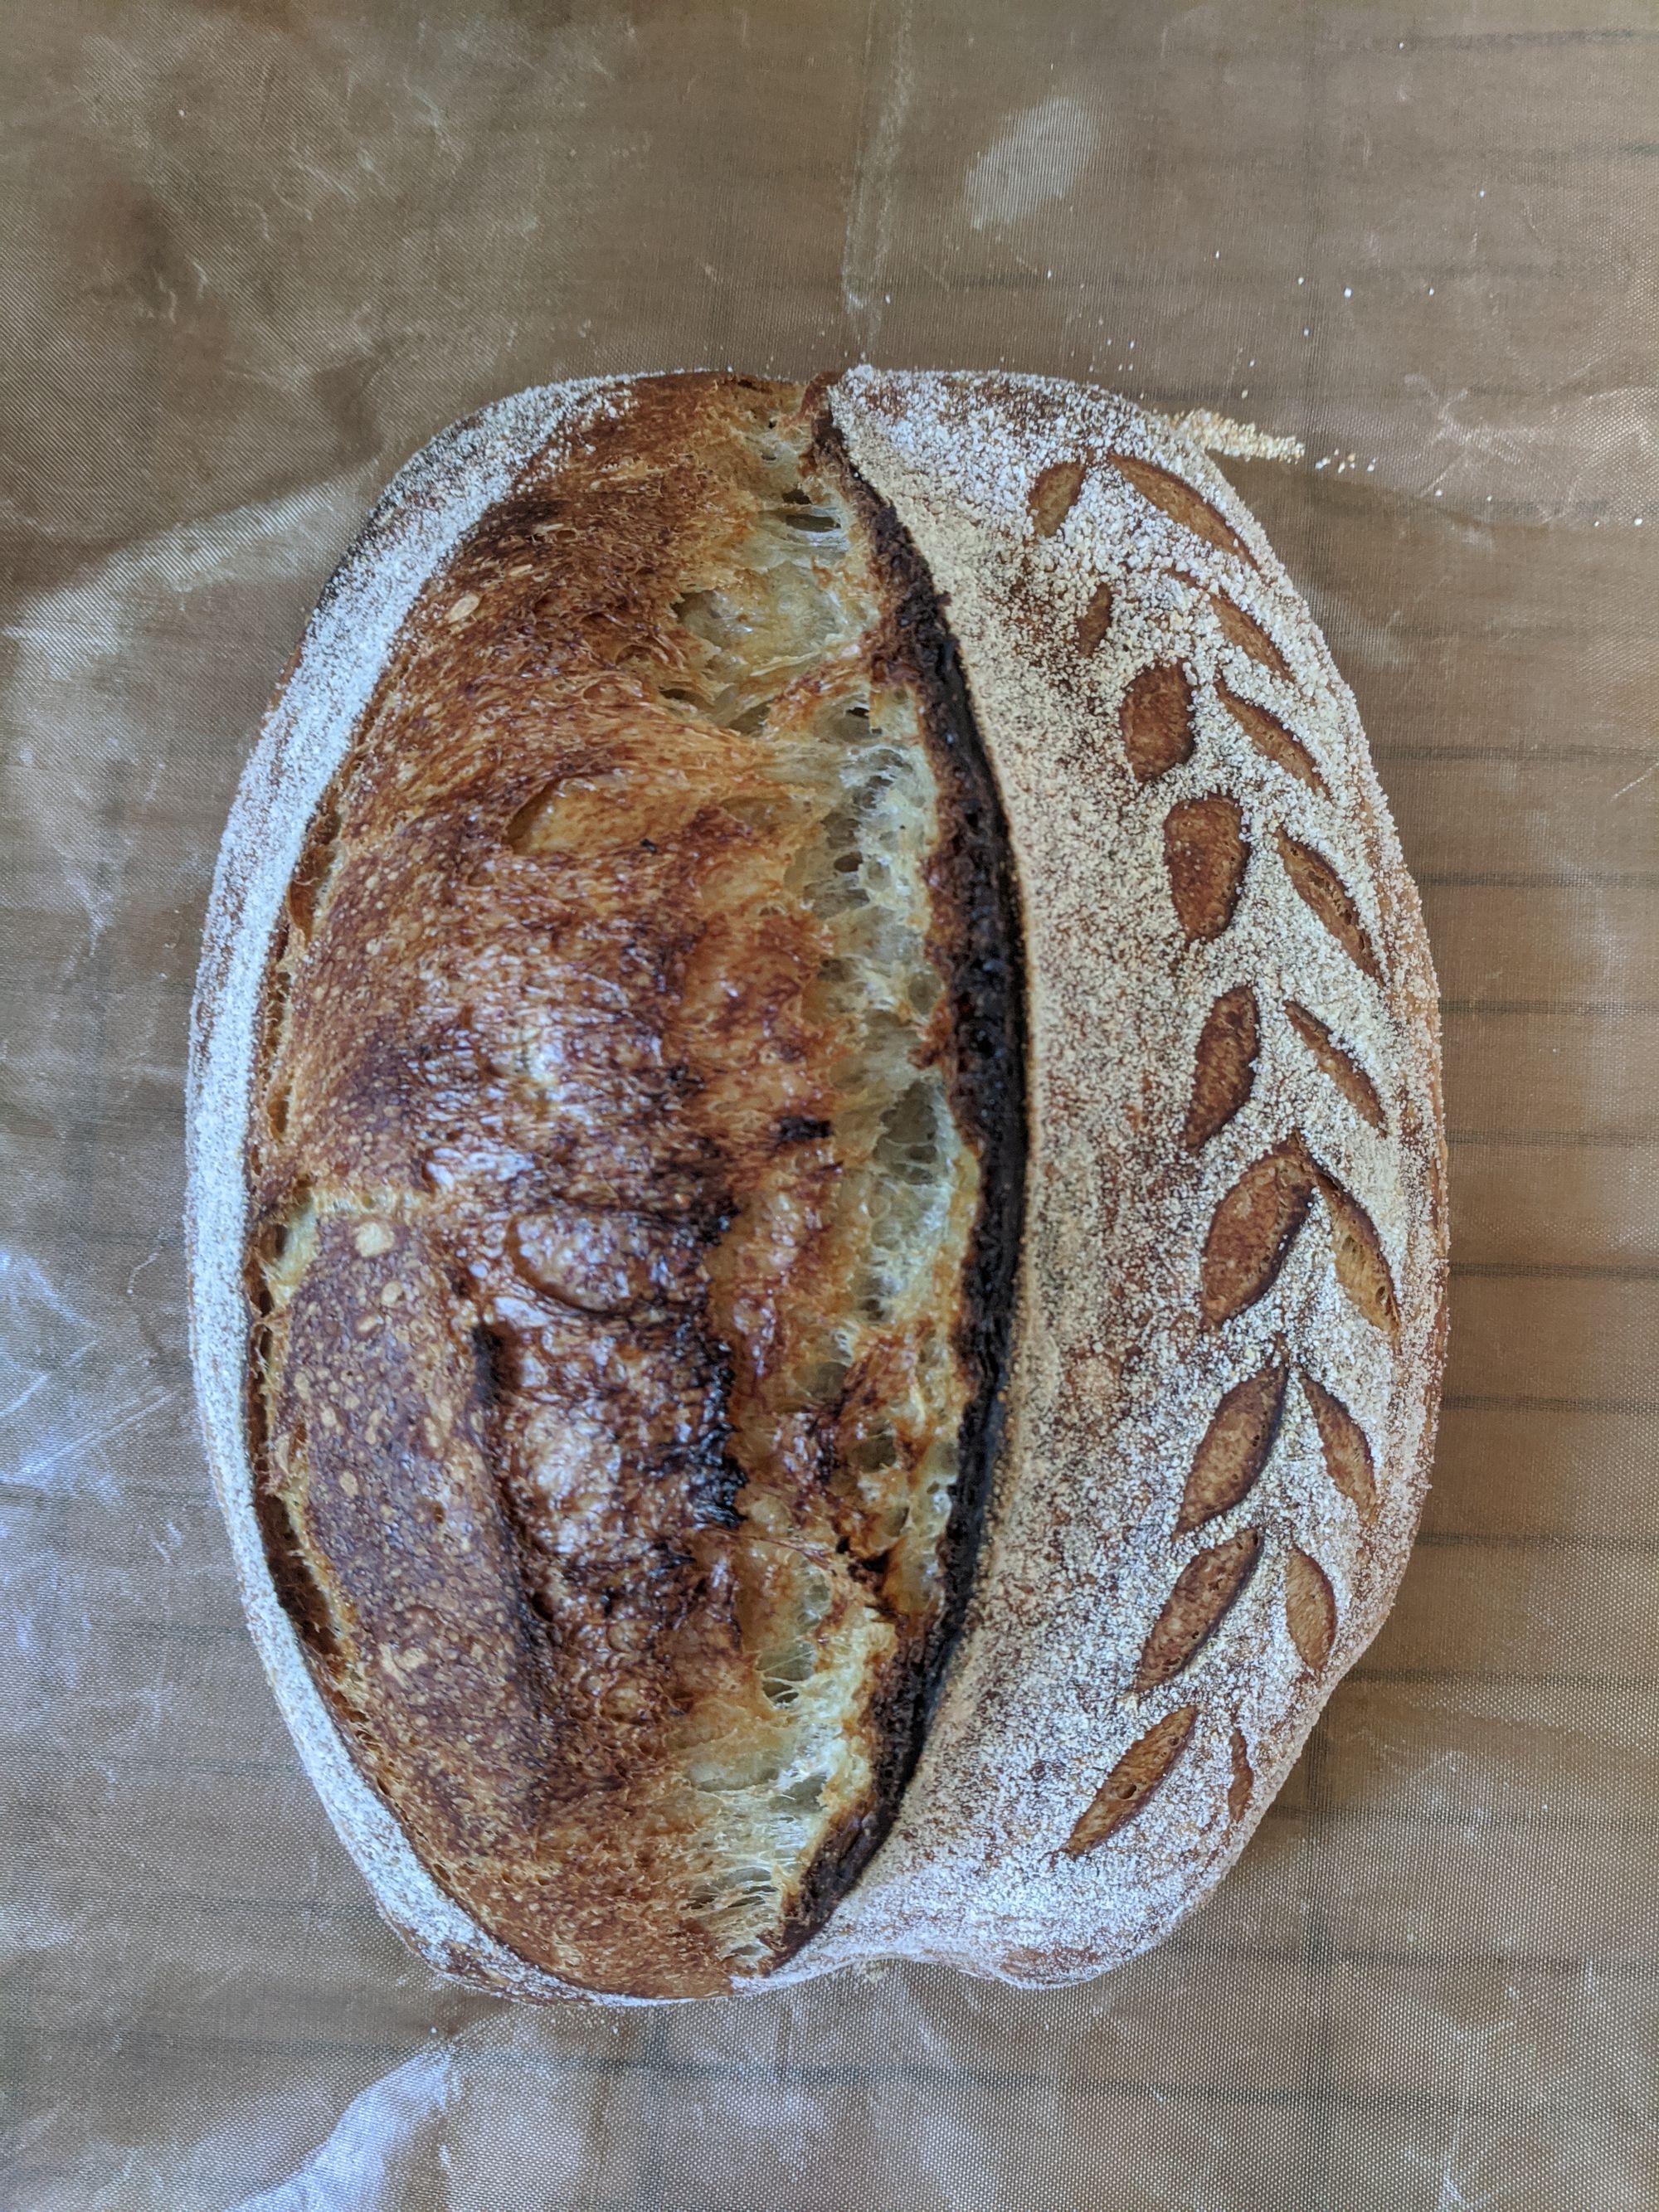
Table loaves and tribulations
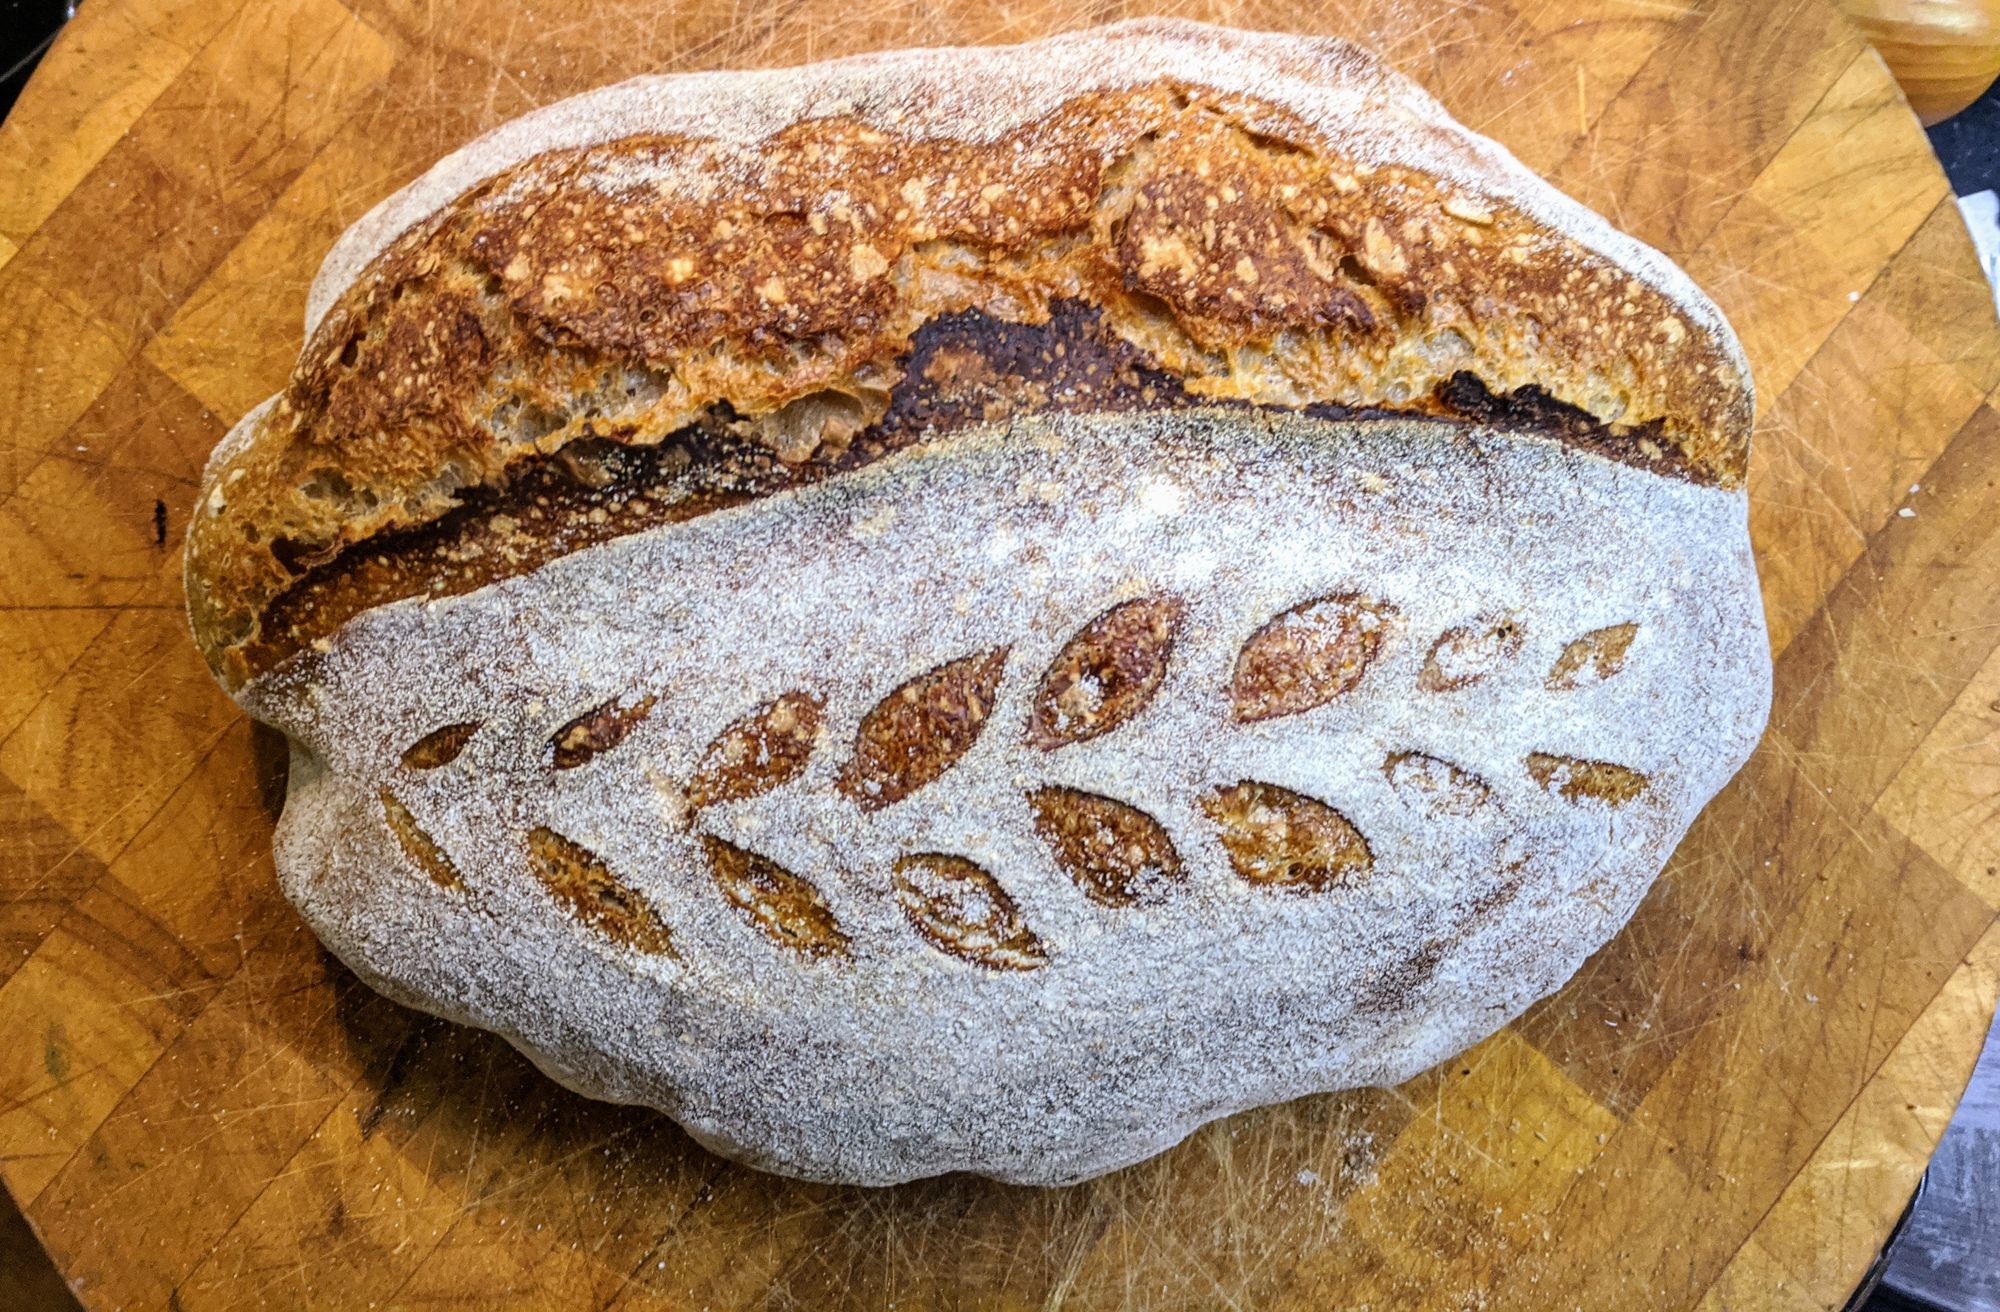
My Table Loaf results were mixed and I never felt like like I really nailed it. Definitely multiple Sour D'oh moments. At best it was ok. But nothing light and open – certainly nothing like it was meant to look!
In contrast to the Patrick Ryan recipe, this recipe incorporates some wholemeal flour. That combined with the longer fermentation resulted in a much tastier loaf.

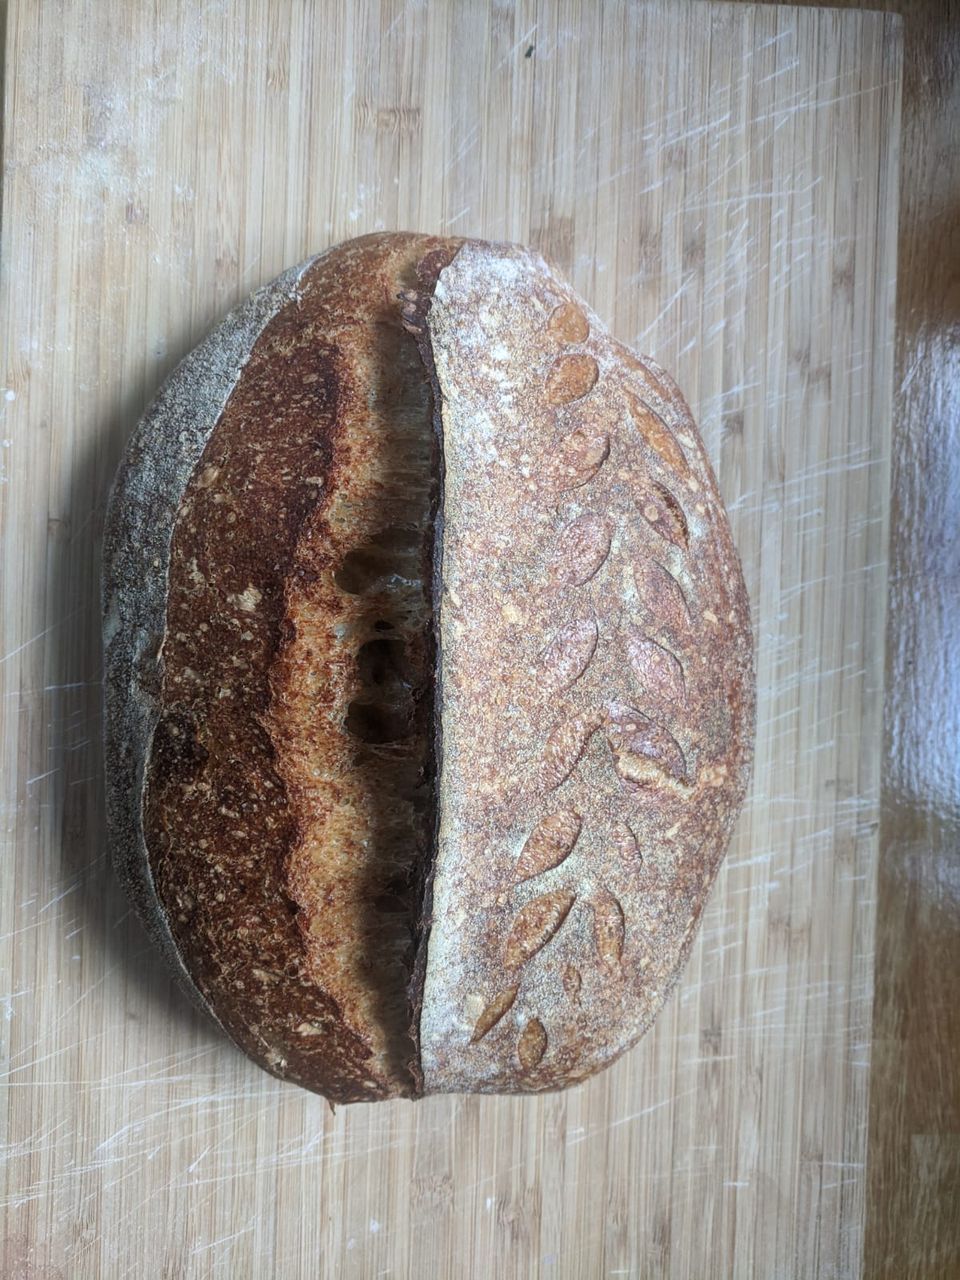
Tartine style
After failing to really succeed in making local-artisan-bakery-quality bread thus far (with the misguided confidence of a total beginner, thinking I could achieve such a thing), I went in search of a different recipe.
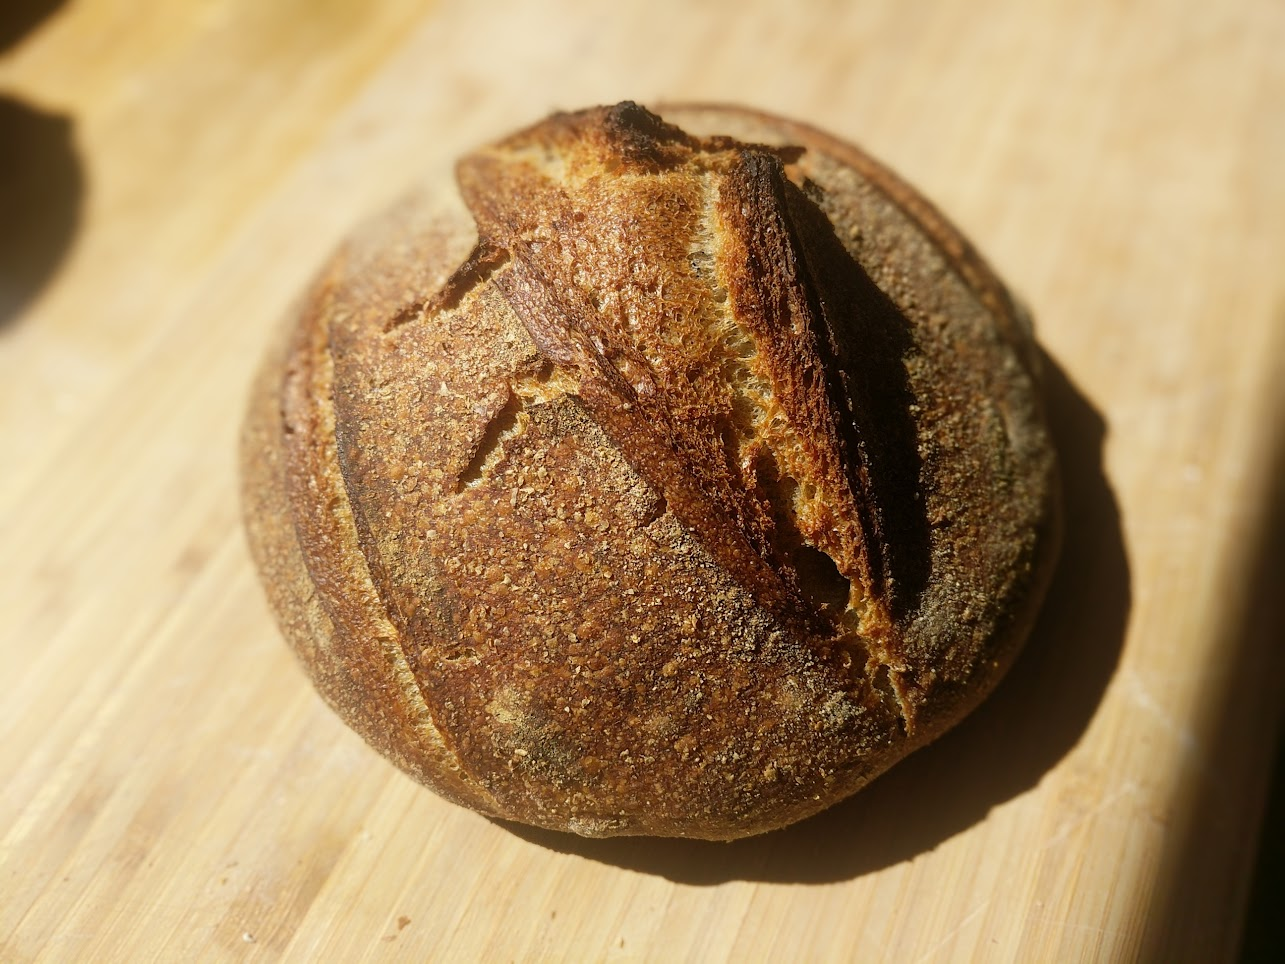
After scouring the internet for recipes, I settled on The Regular Chef's take on Tartine Country bread. Tartine is a famous bakery in San Francisco and their Country Bread recipe was published in the NY times, gaining a lot of recognition and popularity.
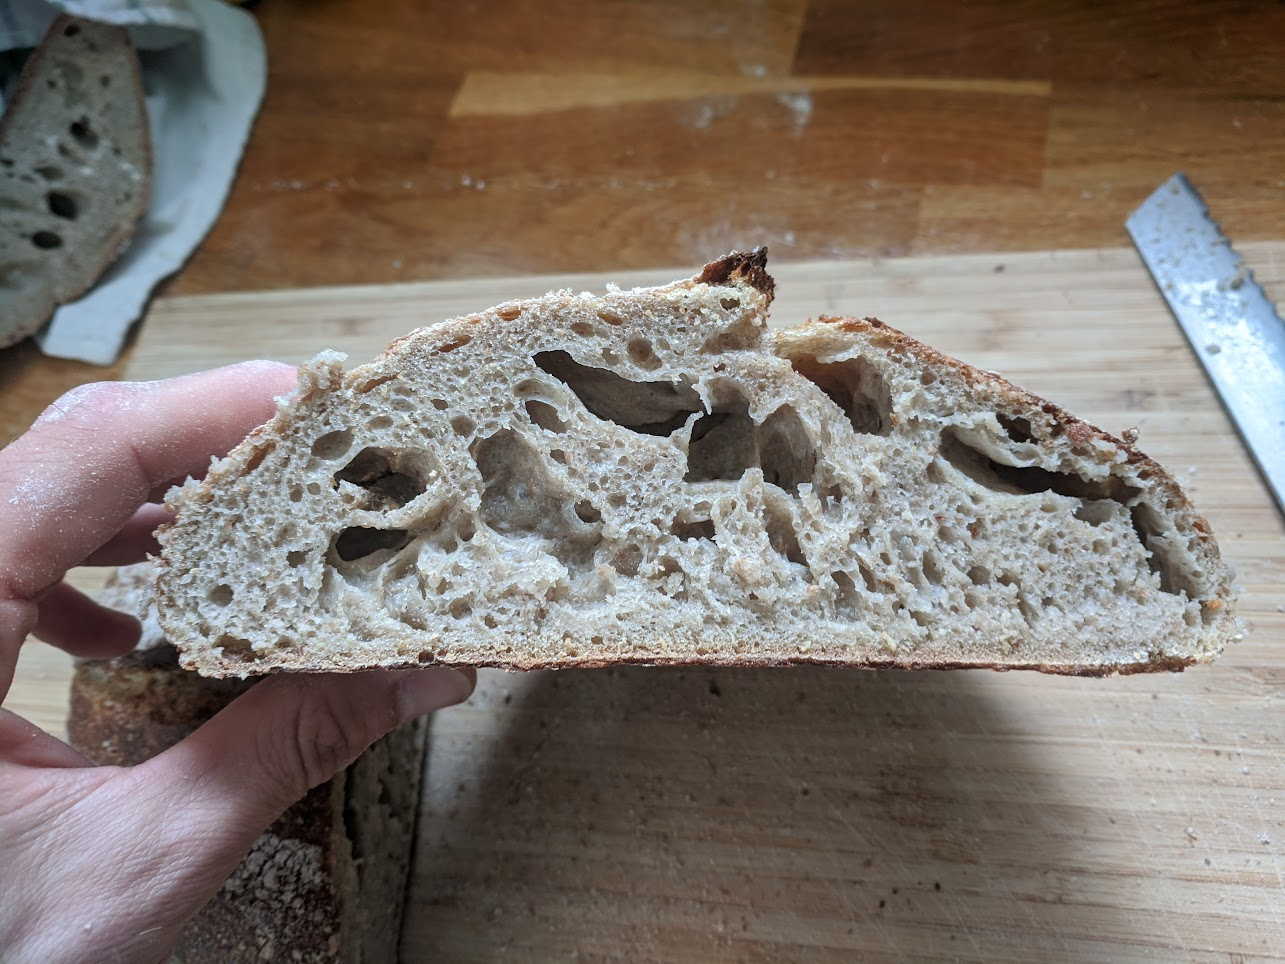
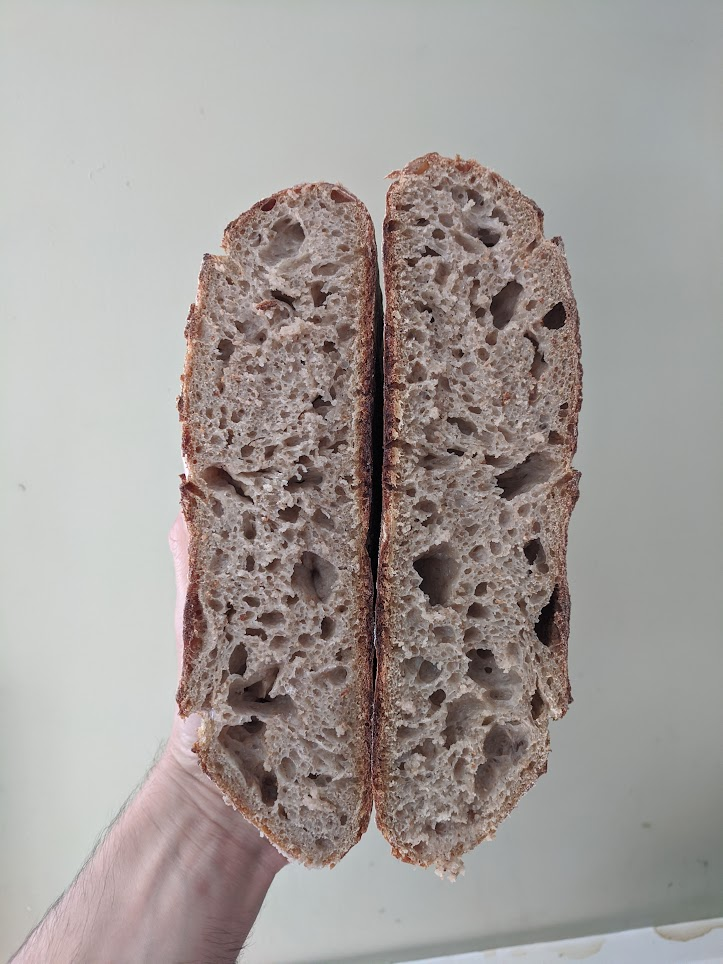
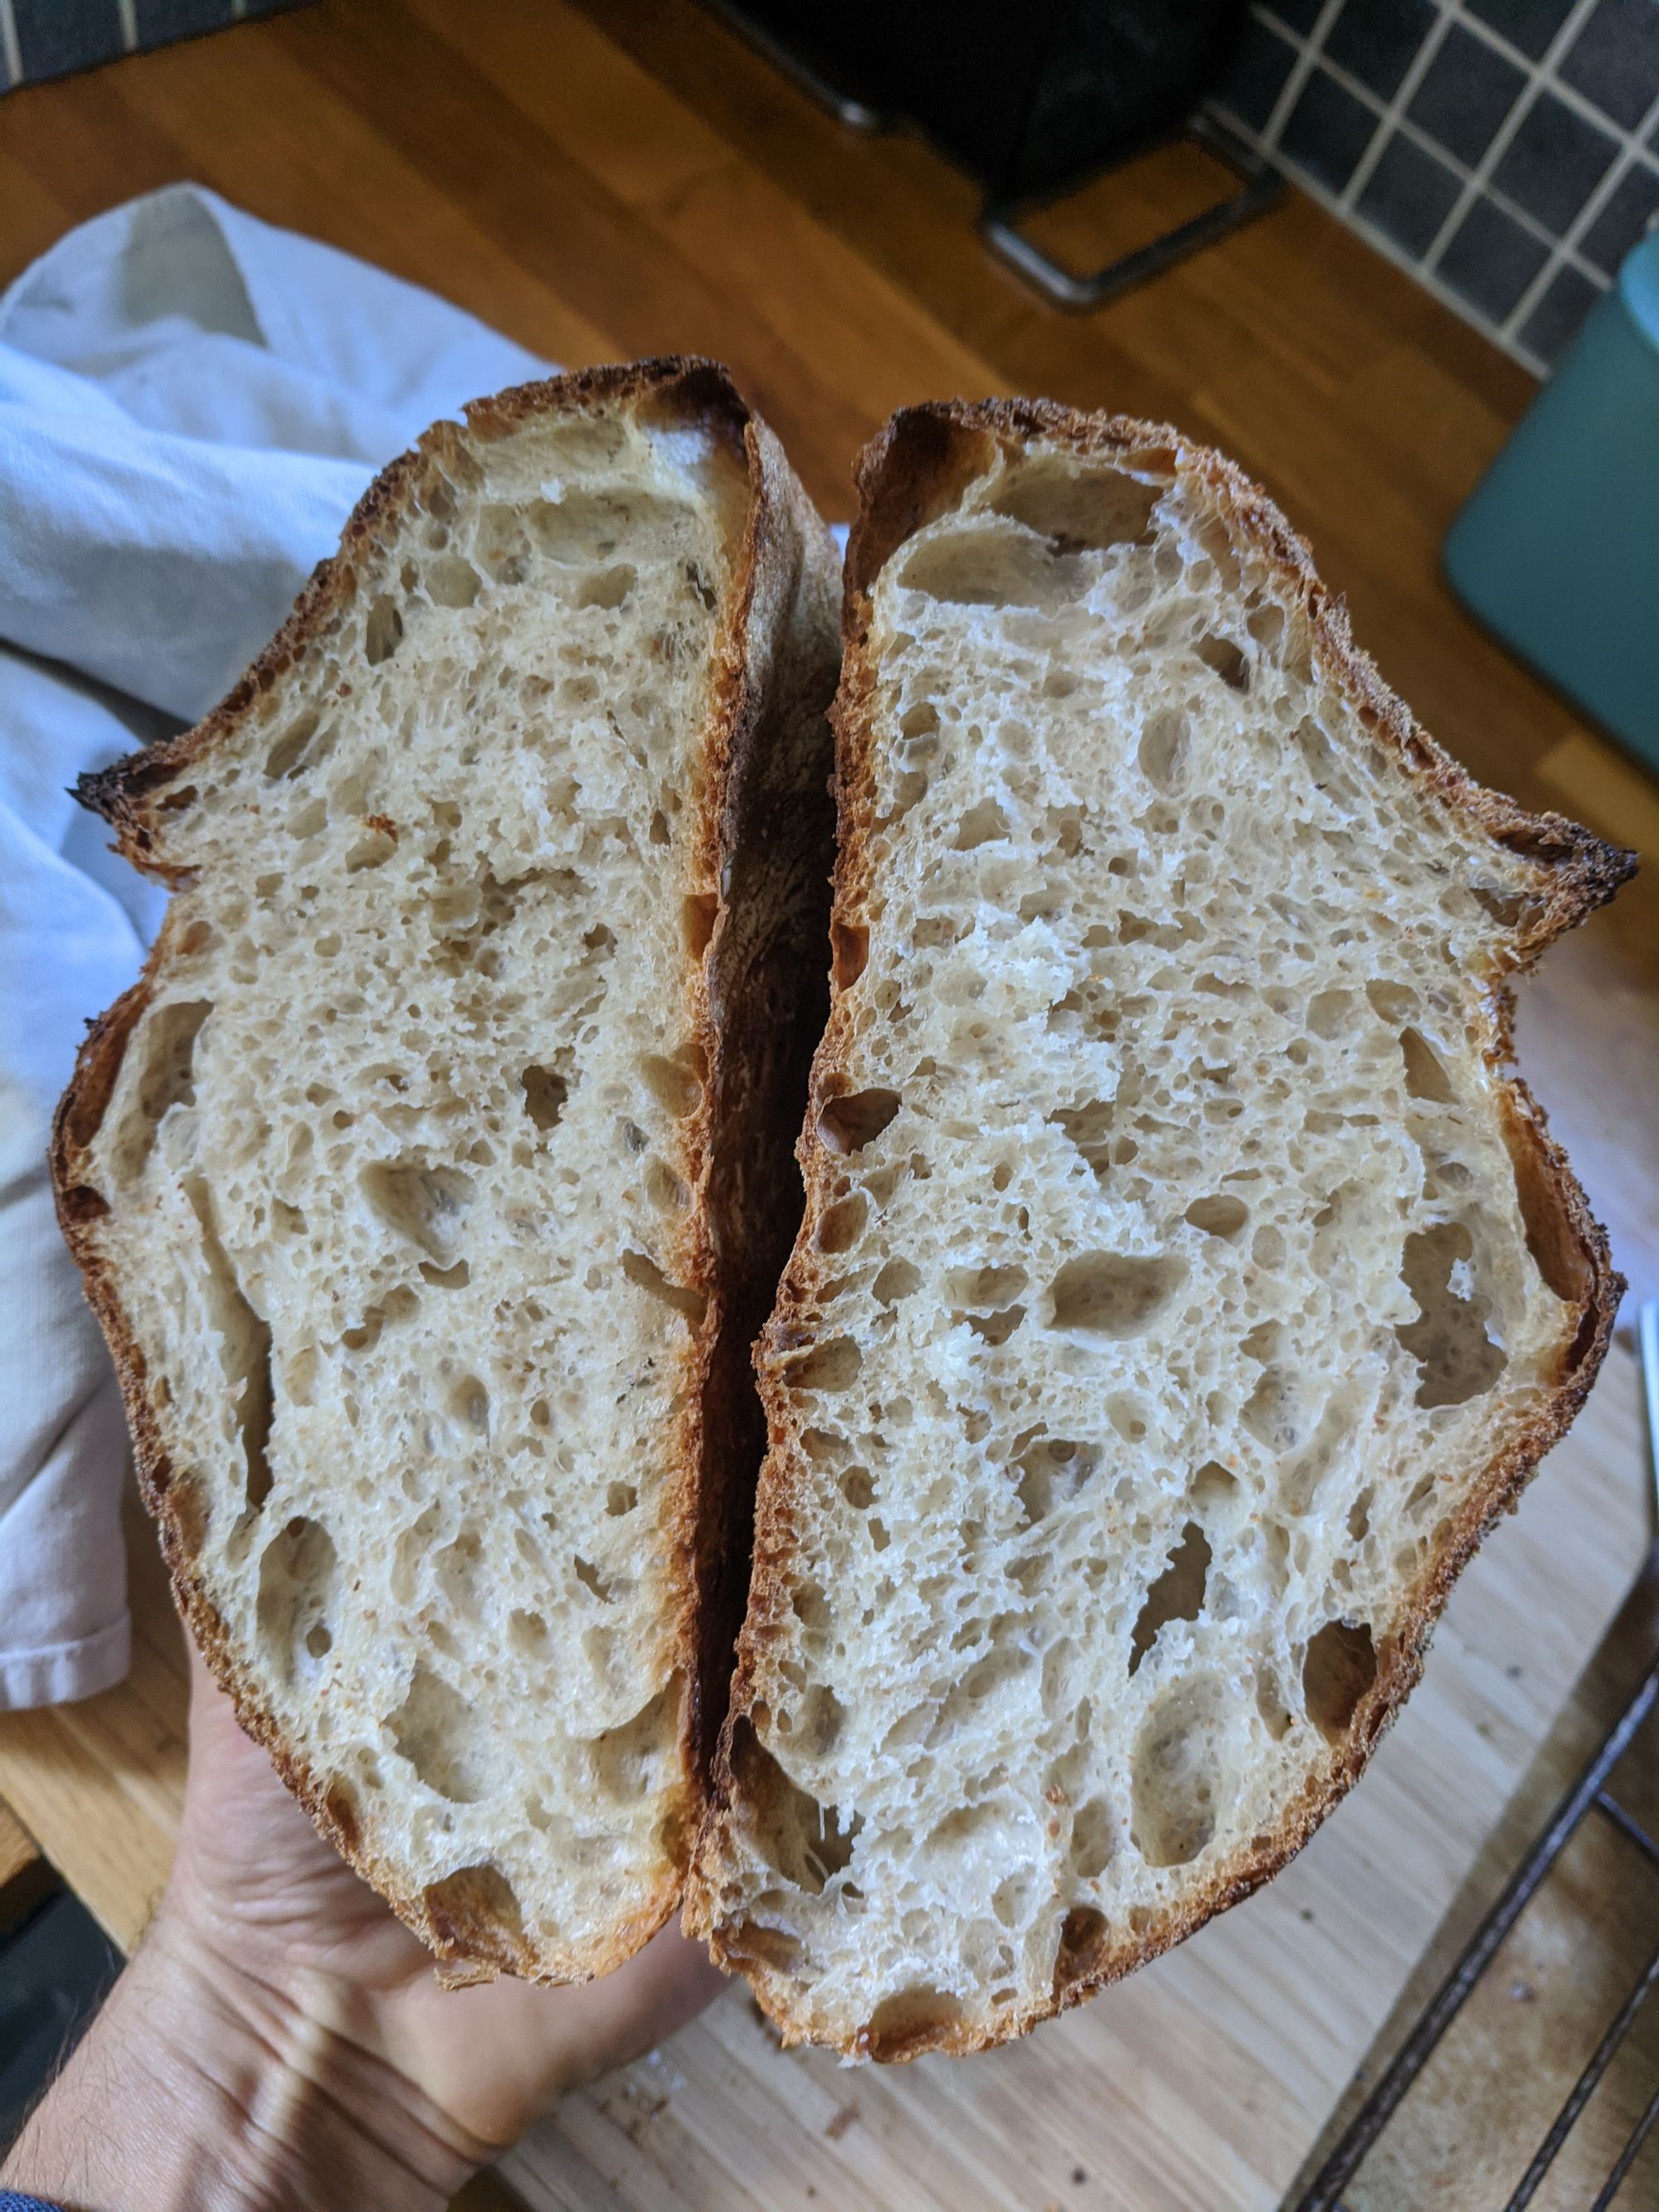
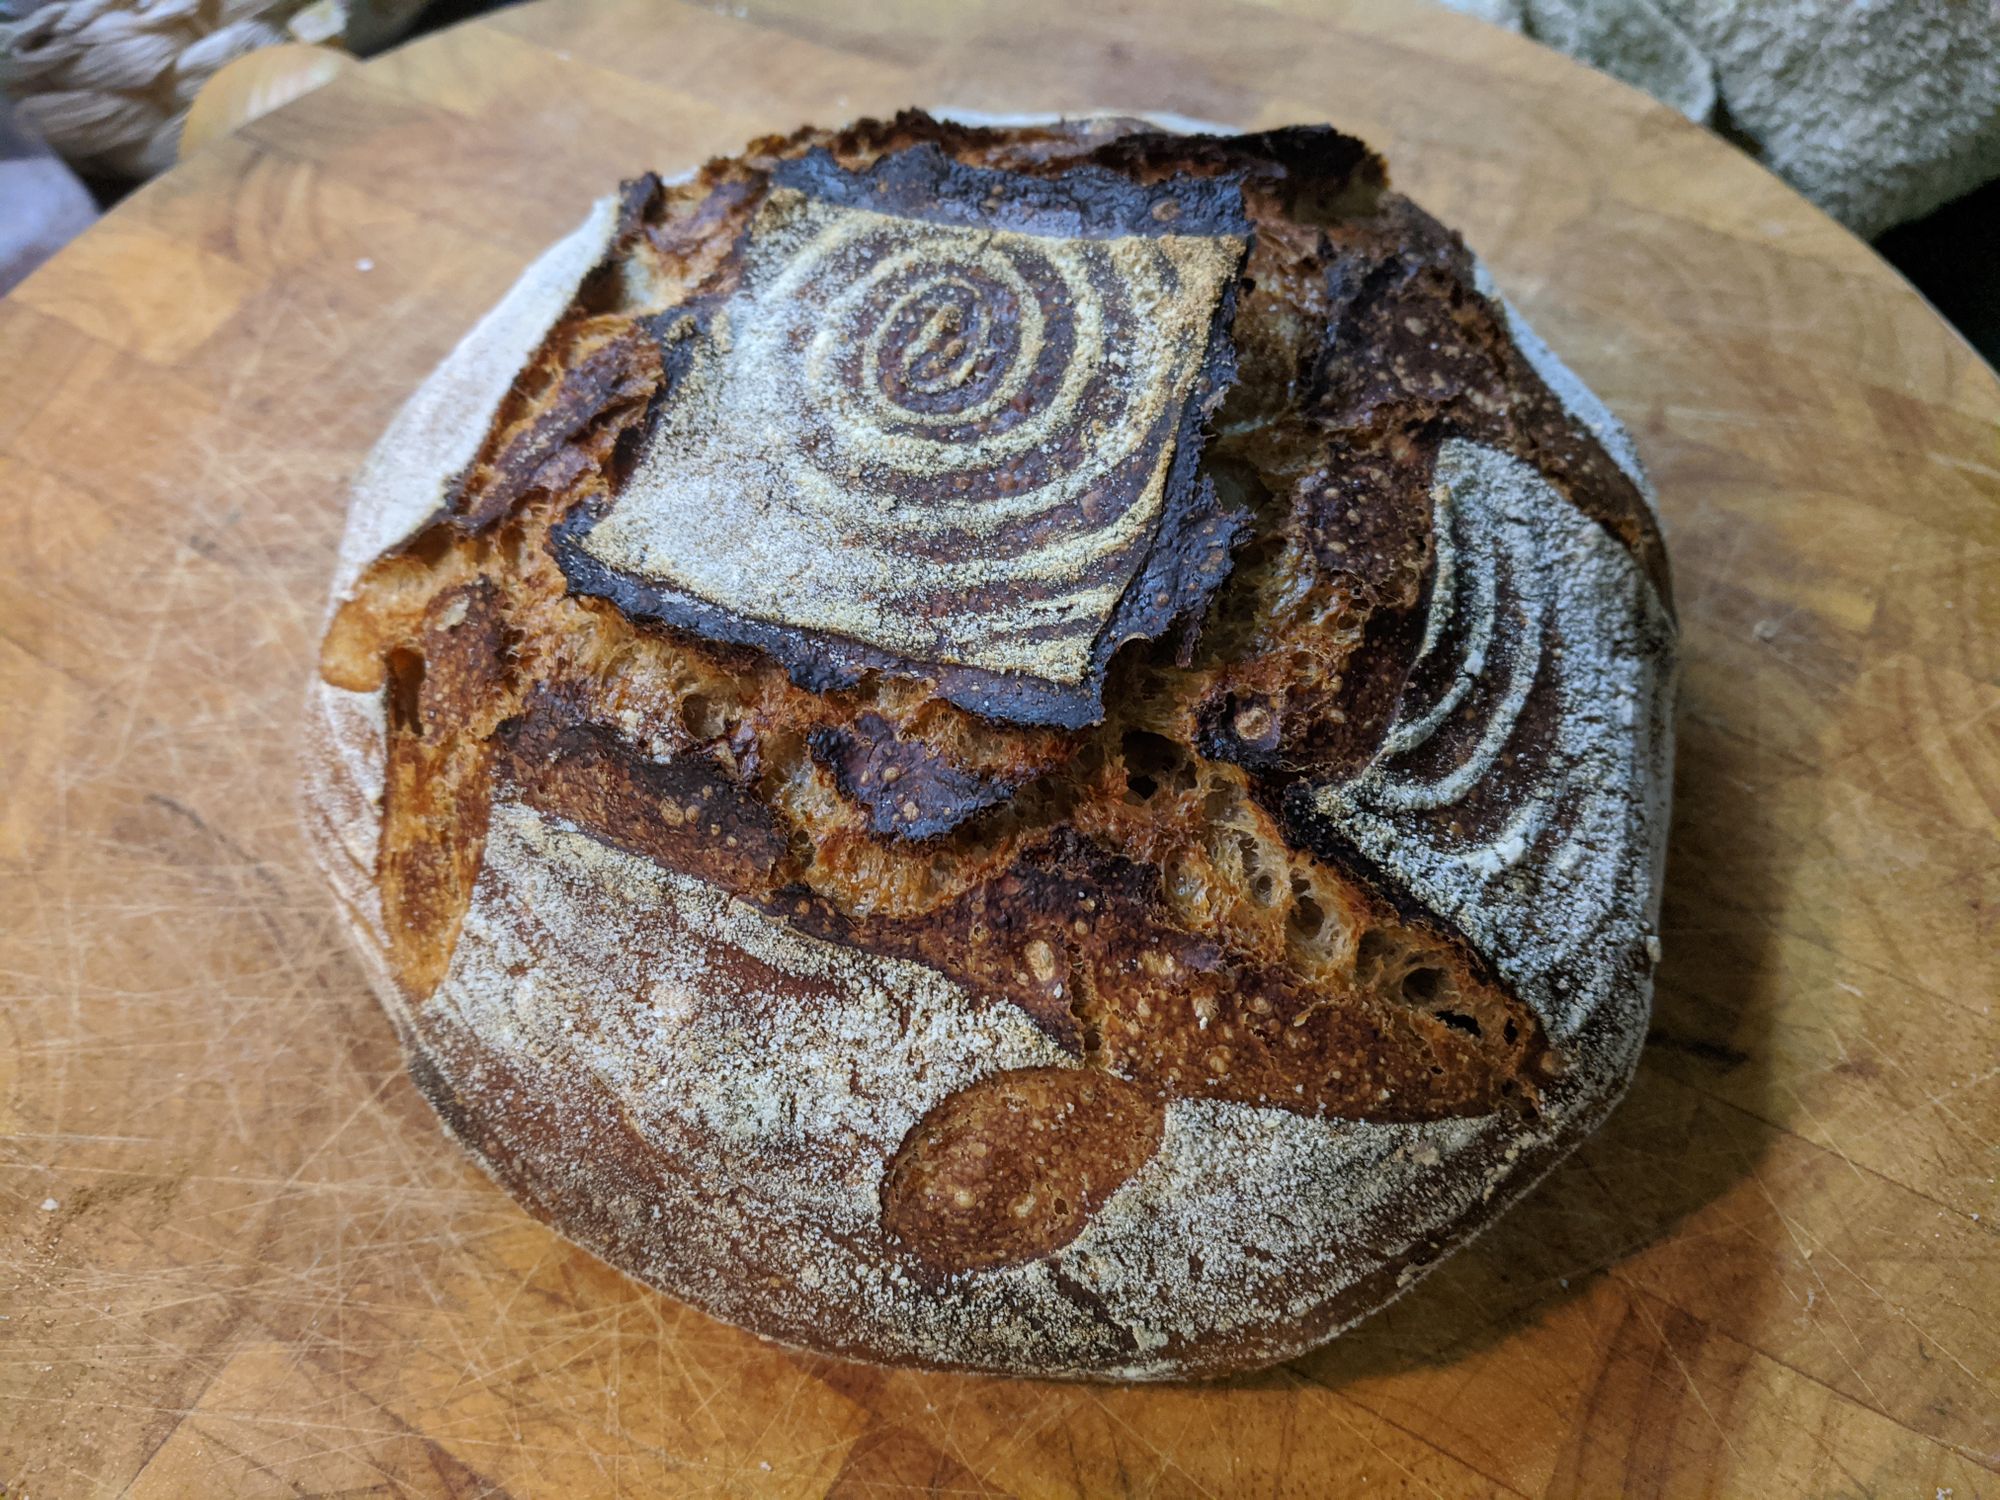
I followed the recipe to the letter, and well, I'll let the pictures do the talking…

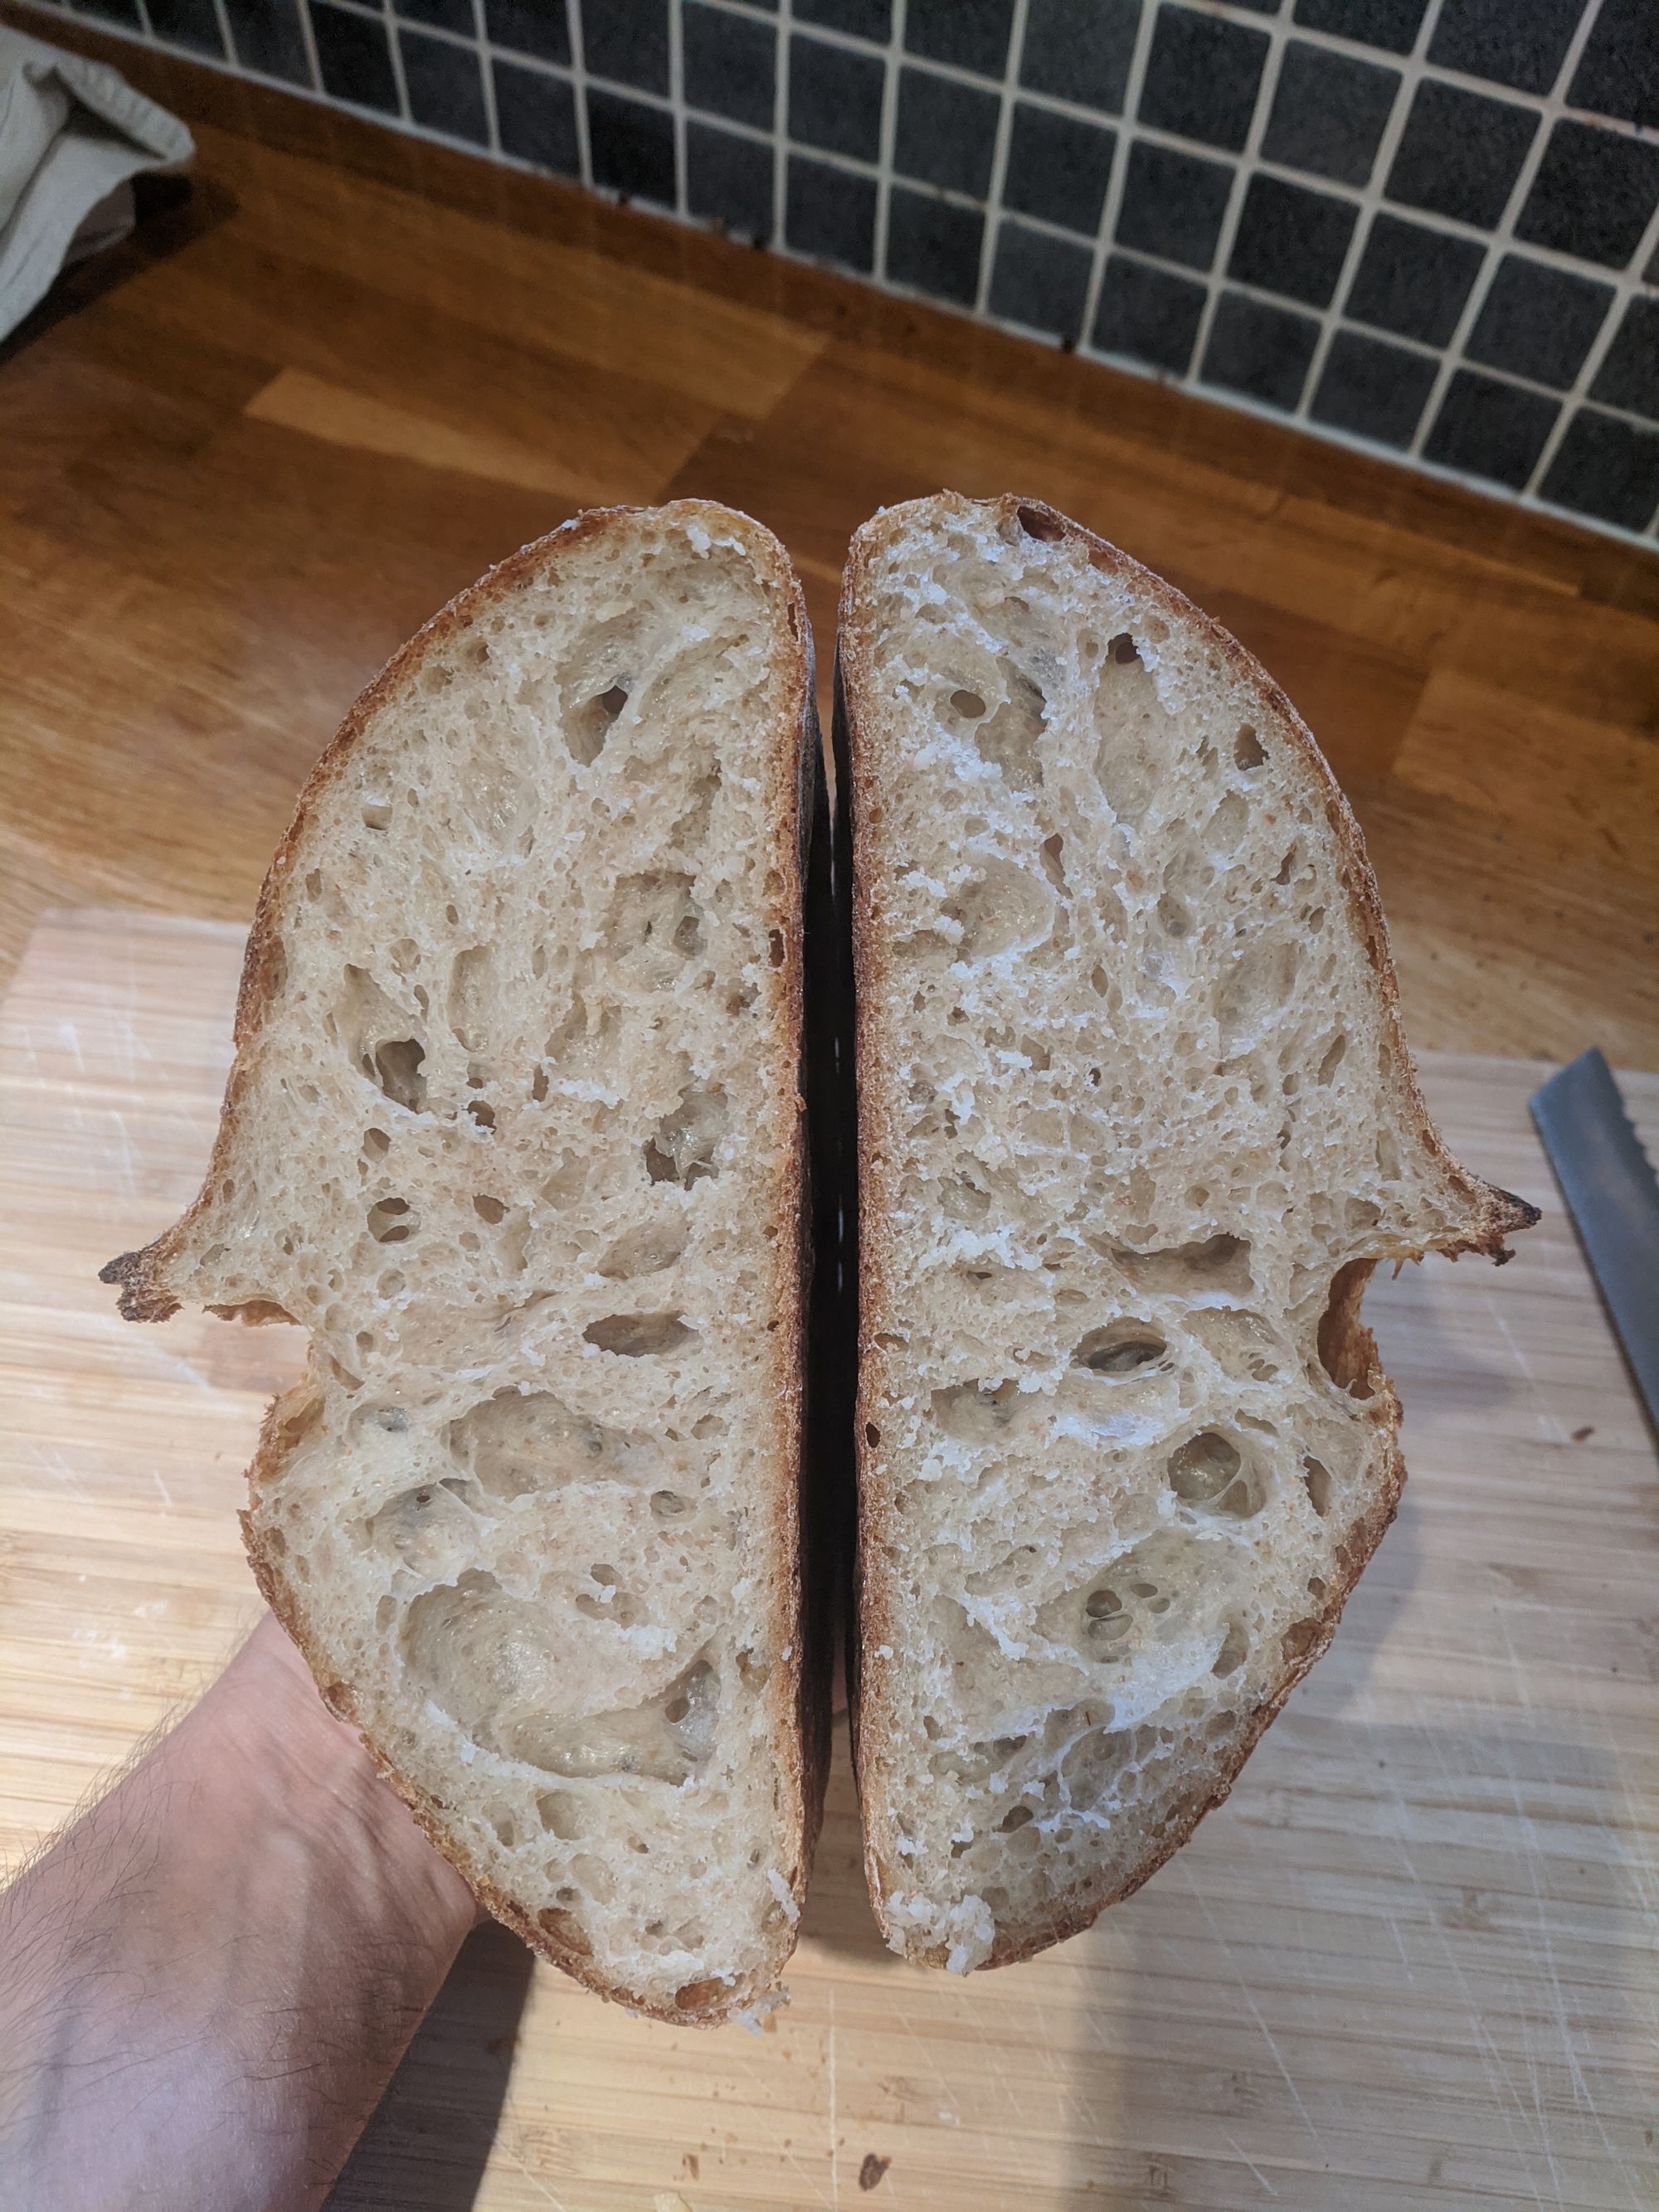
After my initial delight at finally producing an open crumbed loaf, that somewhat resembled the kind of bread I like to buy, soon turned to trepidation. Was it a fluke? Could I do it again?
Turns out, yes 😄
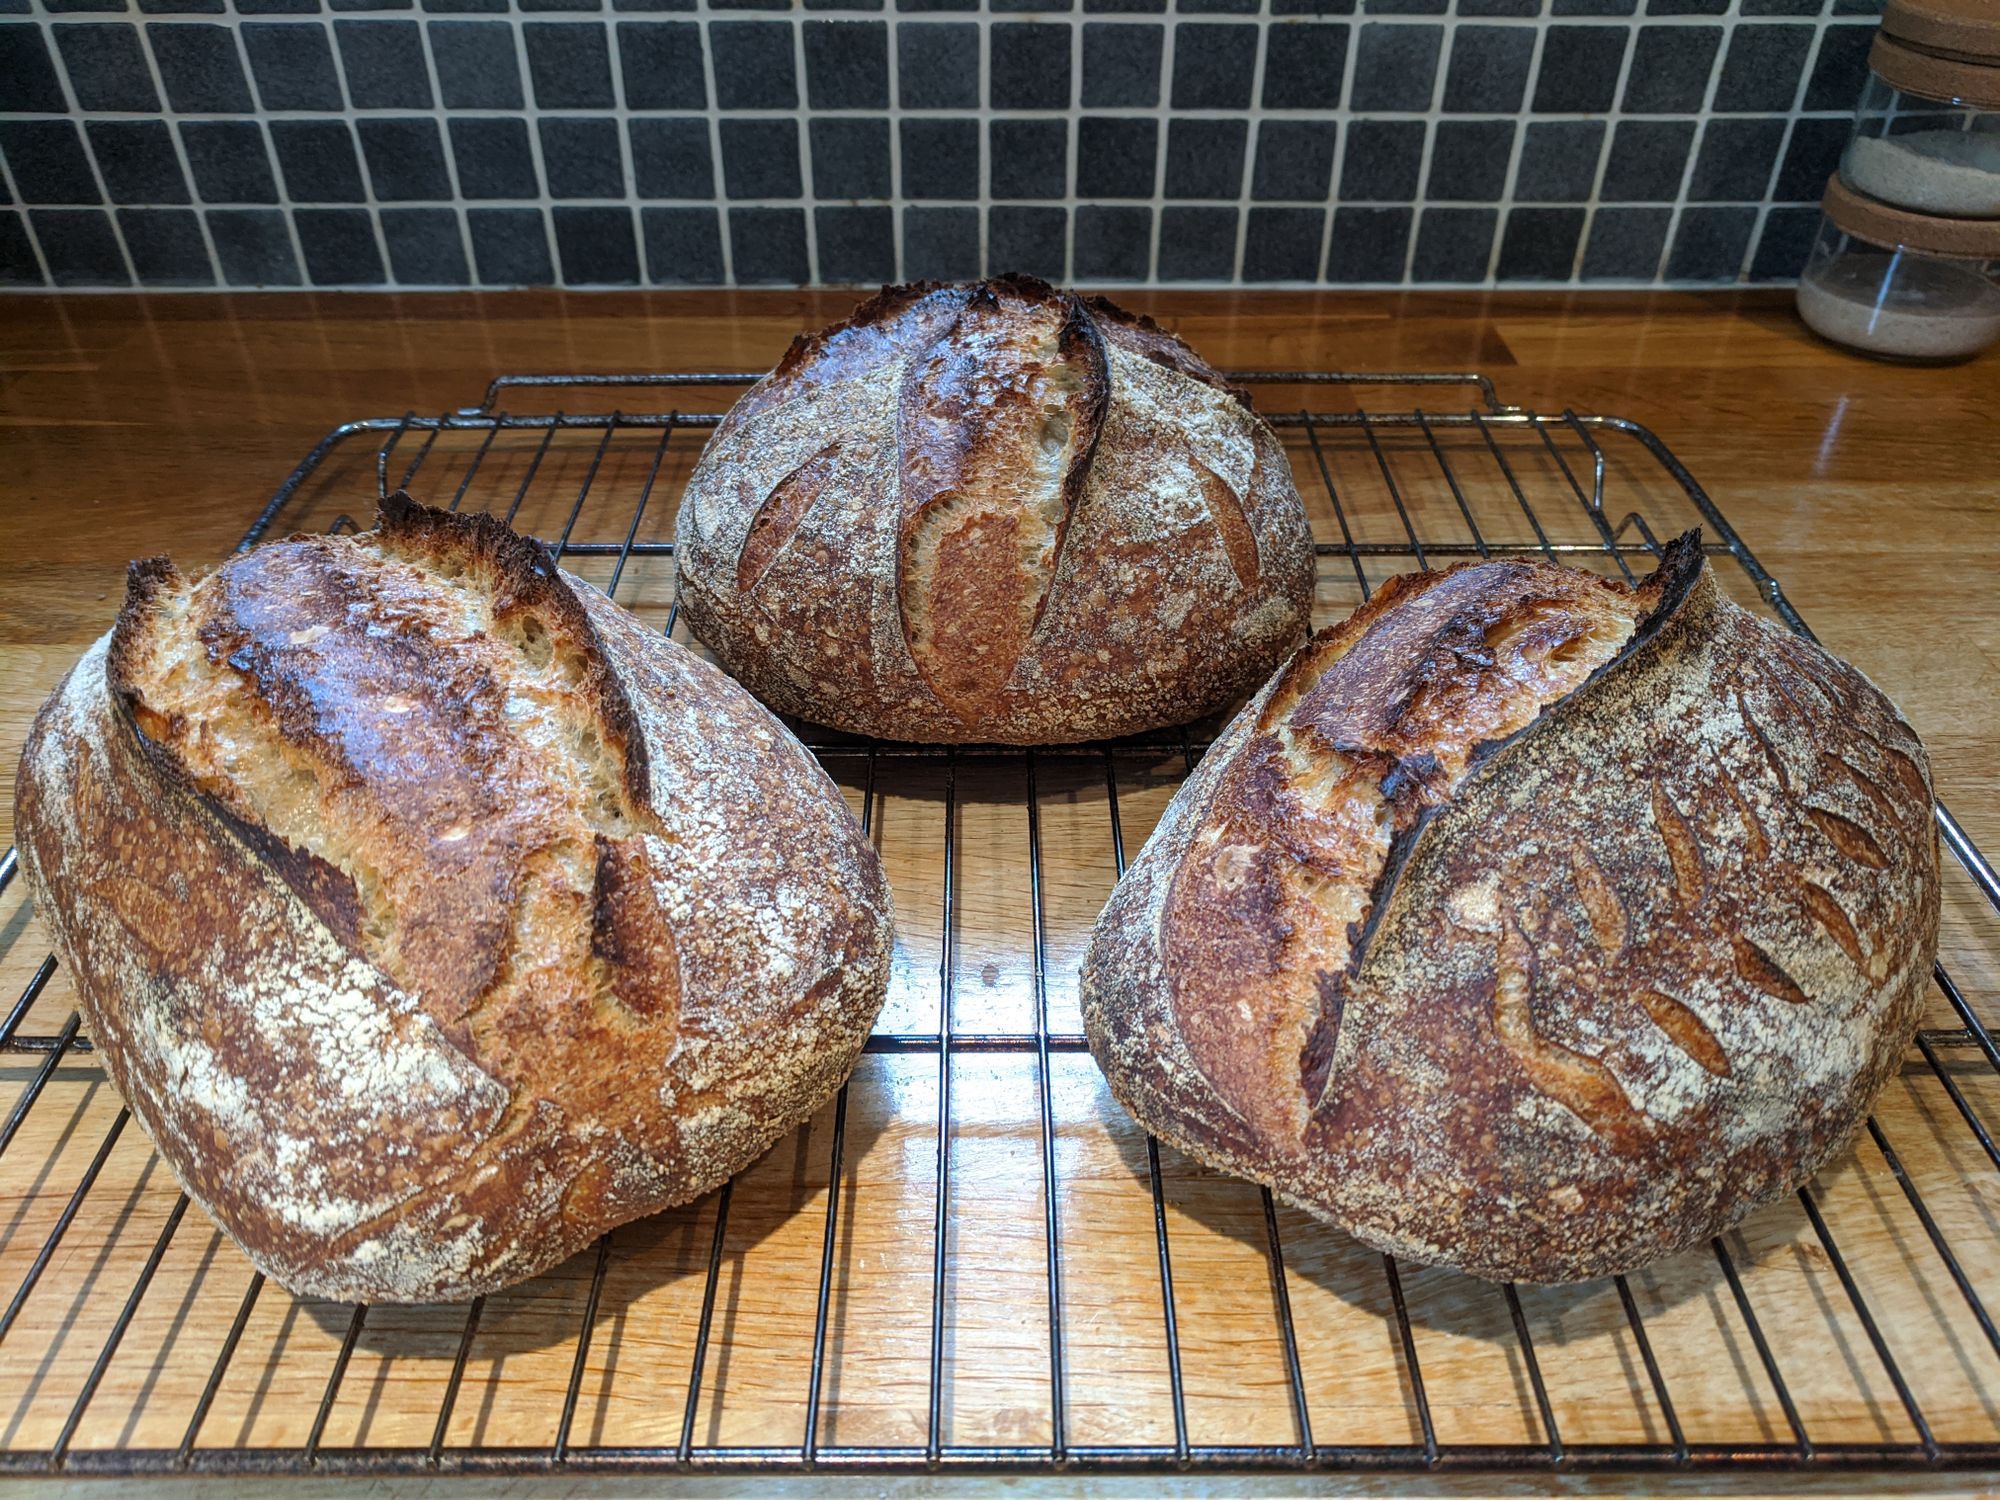
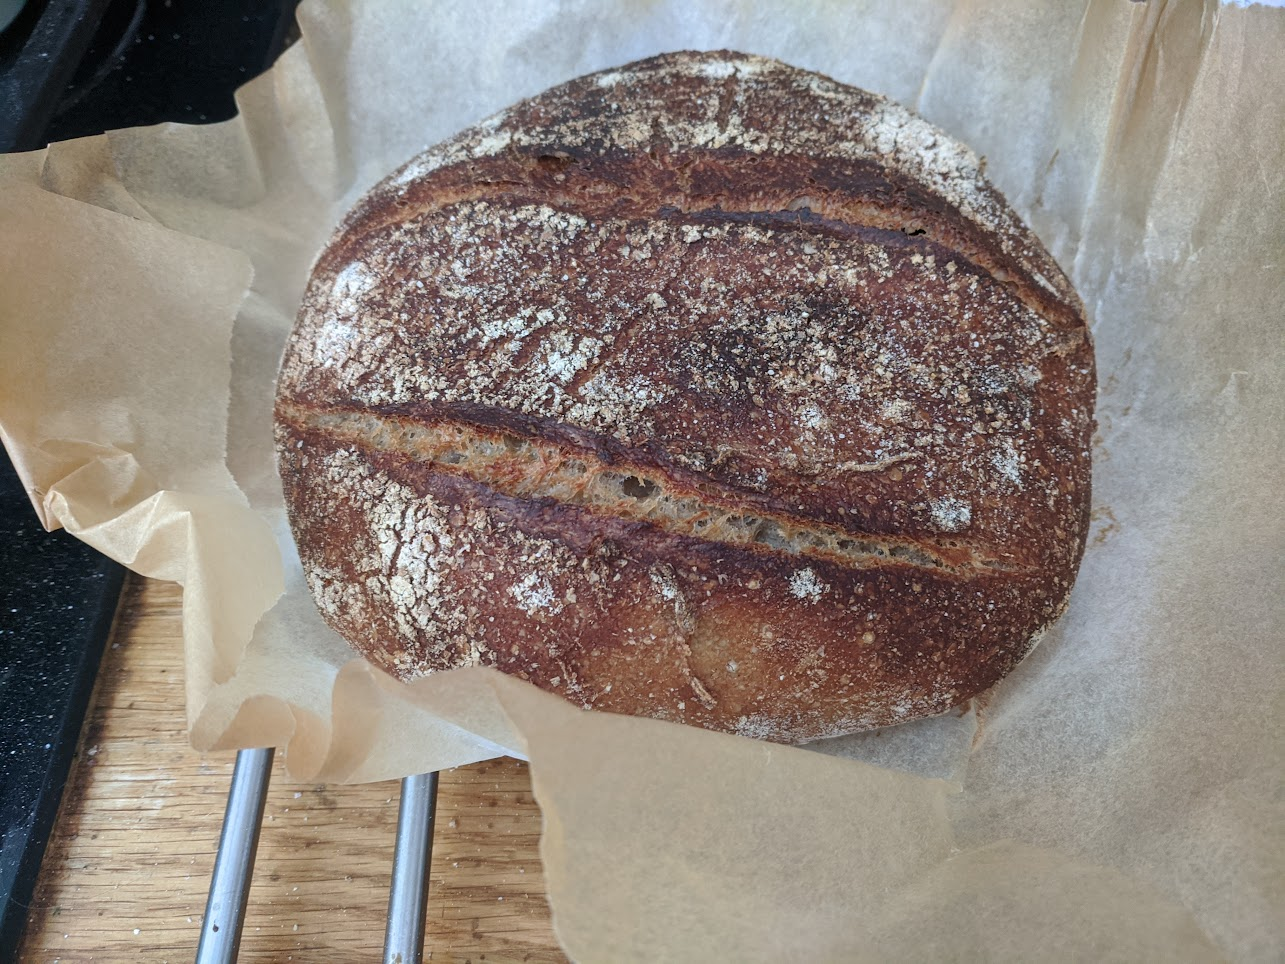
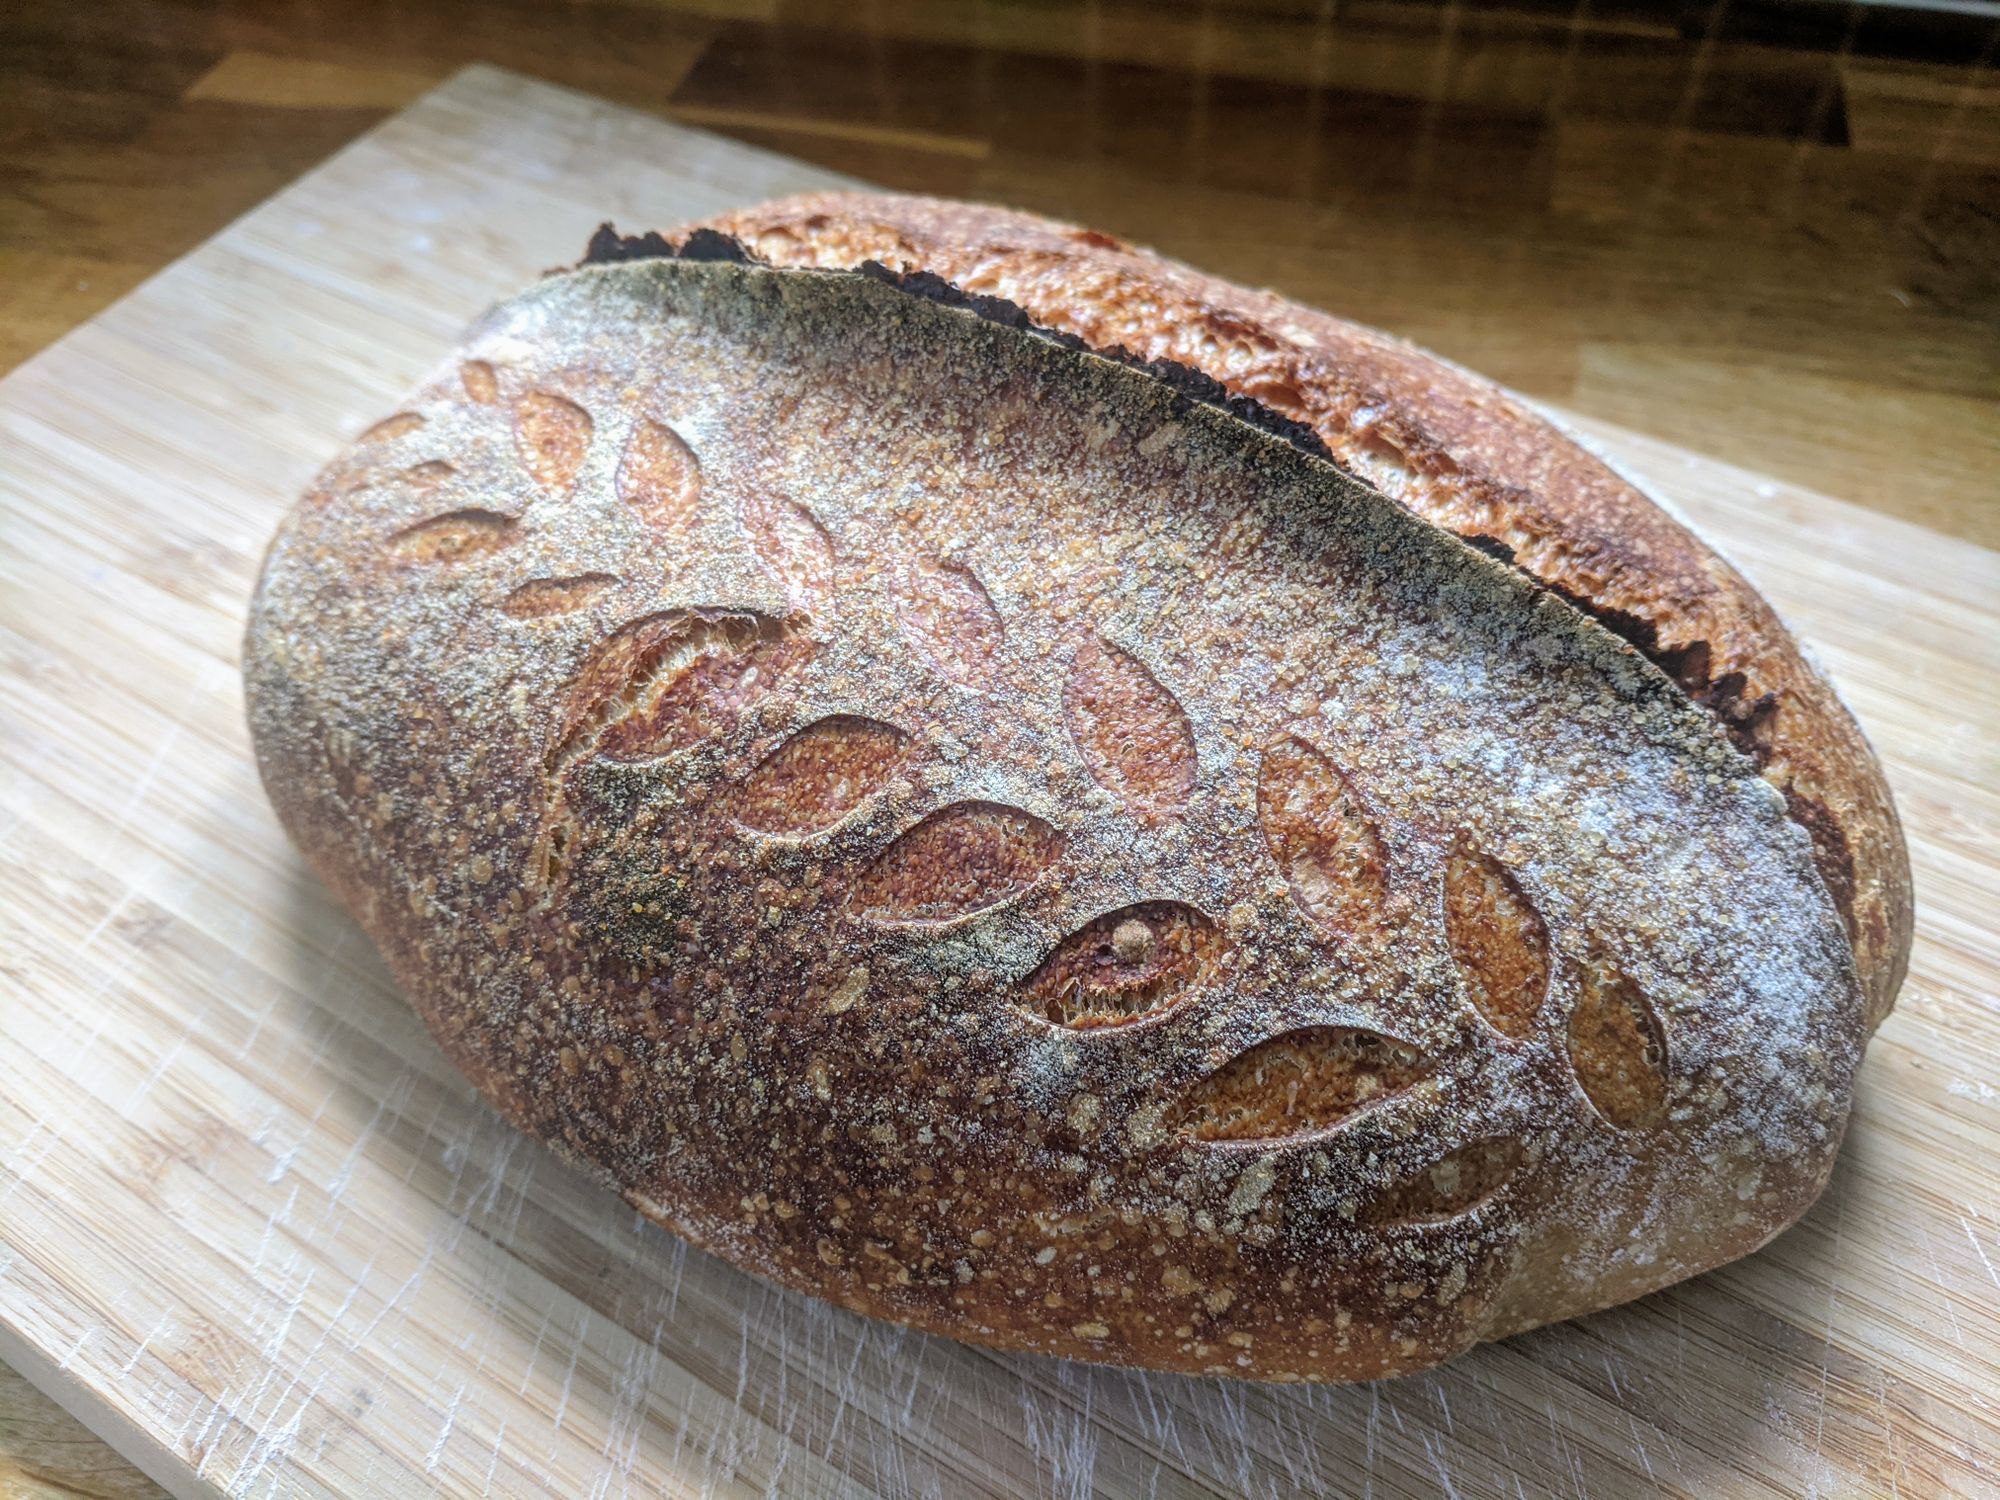
Experimentation
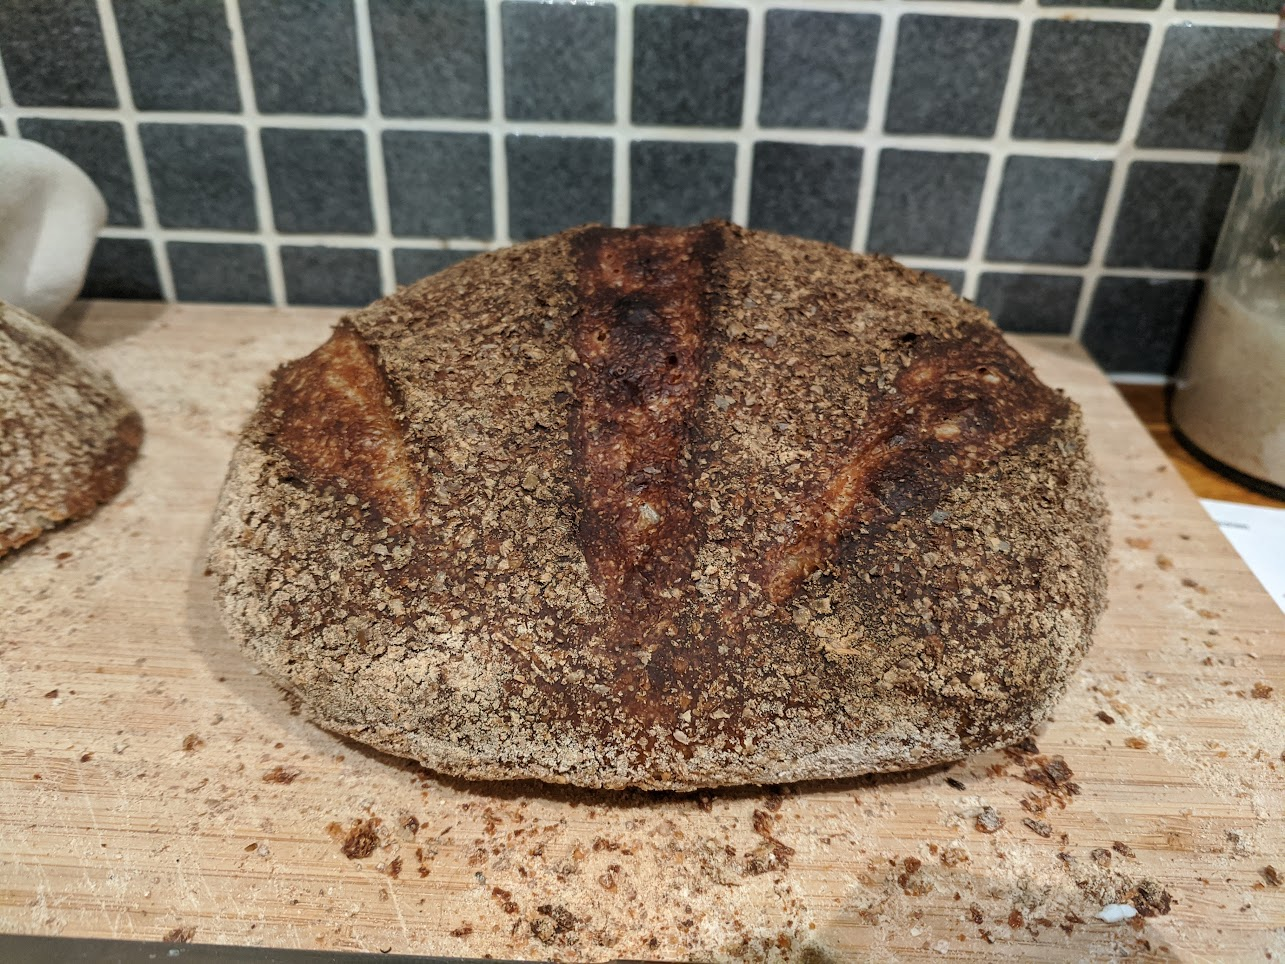
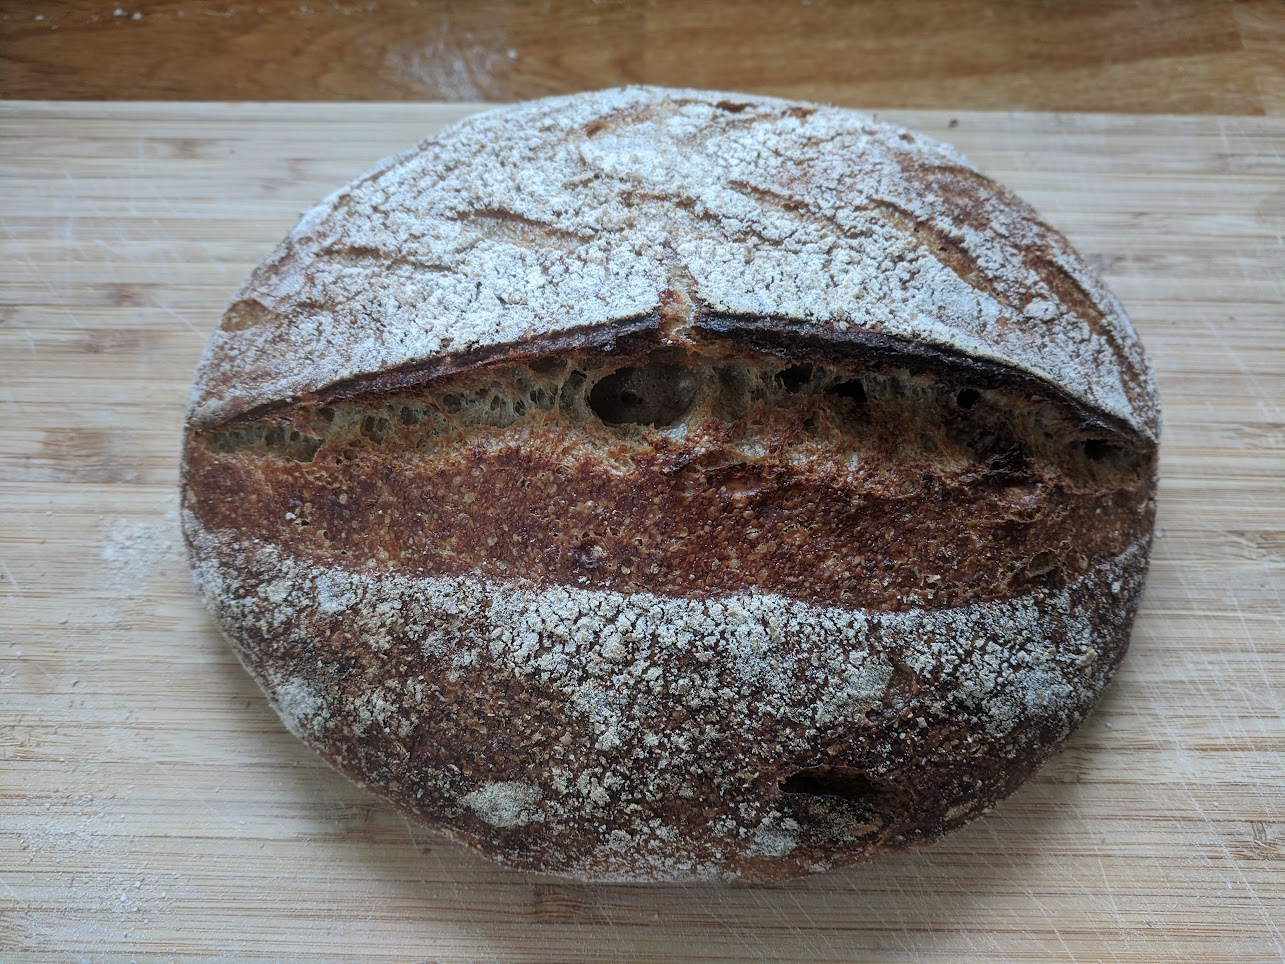
Having found a recipe I was happy with that was reliable and repeatedly giving me good results, I started to experiment with adding whole rye, and even trying to bake with 100% UK stoneground flour.
Starter feeding schedule
I said I'd come back to this. I'll outline my starter feeding schedule below. It keeps the starter alive, but somewhat dormant and then when I'm approaching a bake, I'll reinvigorate it a few days before.
I keep my starter in the fridge, meaning it needs a feed once every 10-14 days. This is because at lower temperatures, the fermentation process is slower. Keeping it in the fridge and having it need less regular feeds means I don’t waste flour feeding it when I'm not baking. I tend to keep around 90g of starter around, so when I feed it I discard all but 30g of it, then add 30g flour and 30g water, which gets it back to 90g.
Before planning a bake, I'll take it out a day or two before to let it “wake up”, giving it one or two feeds at room temperature so that it’s in good shape to start baking.
At room temperature, my starter wants feeding roughly every 12 hours (after it has doubled in size and started falling). This varies depending on your starter and the ambient temperature of your room though. If you are trying to build up more starter for a recipe, don’t discard any, but if you keep it in a small container like me, you will need to move into a different container to accommodate the bigger size.
The rule for feeding is very simple: whatever the starter weighs, feed it that same amount of flour and same amount of water. E.g. if you have 70g starter, add 70g flour and 70g water.
I use a 50/50 white/wholemeal mix of flour to feed the starter, but whatever you have will work. It doesn’t even need to be bread flour.
And that's it. Hope you enjoyed this or found it useful.
