This is the final part of a series on my bike build:
- More assembly
- Mission accomplished (this post) 🎉
Last time I left you dangling with an almost bike-shaped object. The tasks remaining were to buy and fit the brakes, to buy and fit tubes, fit the chain and to dial in the derailleur.
Brakes
In the last post I fitted my biiiiig rotors, but I needed some stoppers to actually do the stopping. My research boiled down to the following:
- Avid brakes (now owned by SRAM): decent price, adequate stopping, nightmare to bleed
- SRAM brakes: decent, various price points, softer/progressive feel
- Shimano brakes: decent, various price points, sharper/snappier feel
- Hope: very decent, very price
I know that I prefer a sharper feel to my brakes, so I slightly preferred the sound of Shimano. Then, I found a particular model – SLX M675s – which had both incredibly reviews and were at a great price point. I managed to find what seemed like the last pair left on the internet from Merlin Cycles @ £109. Compared with the next model down (Deore M615) @ £90/pair, and the next model up (XT M8000) @ £145/pair. The internet’s consensus seemed to be that the SLXs were a huge improvement on the Deores, but that the price hike to the XTs wasn't really worth the performance gain.
A slight fly in the ointment was that the set I was shipped were the European/American way round – i.e. left=front, right=back. Usually a new set of brake hoses need shortening anyway, but at least if the callipers are connected to the correct levers you can do them one at a time. As it was I had to do them both at once. A third hand would have been particularly useful at this point…
Below: midway through the delicate hose-swapping operation.
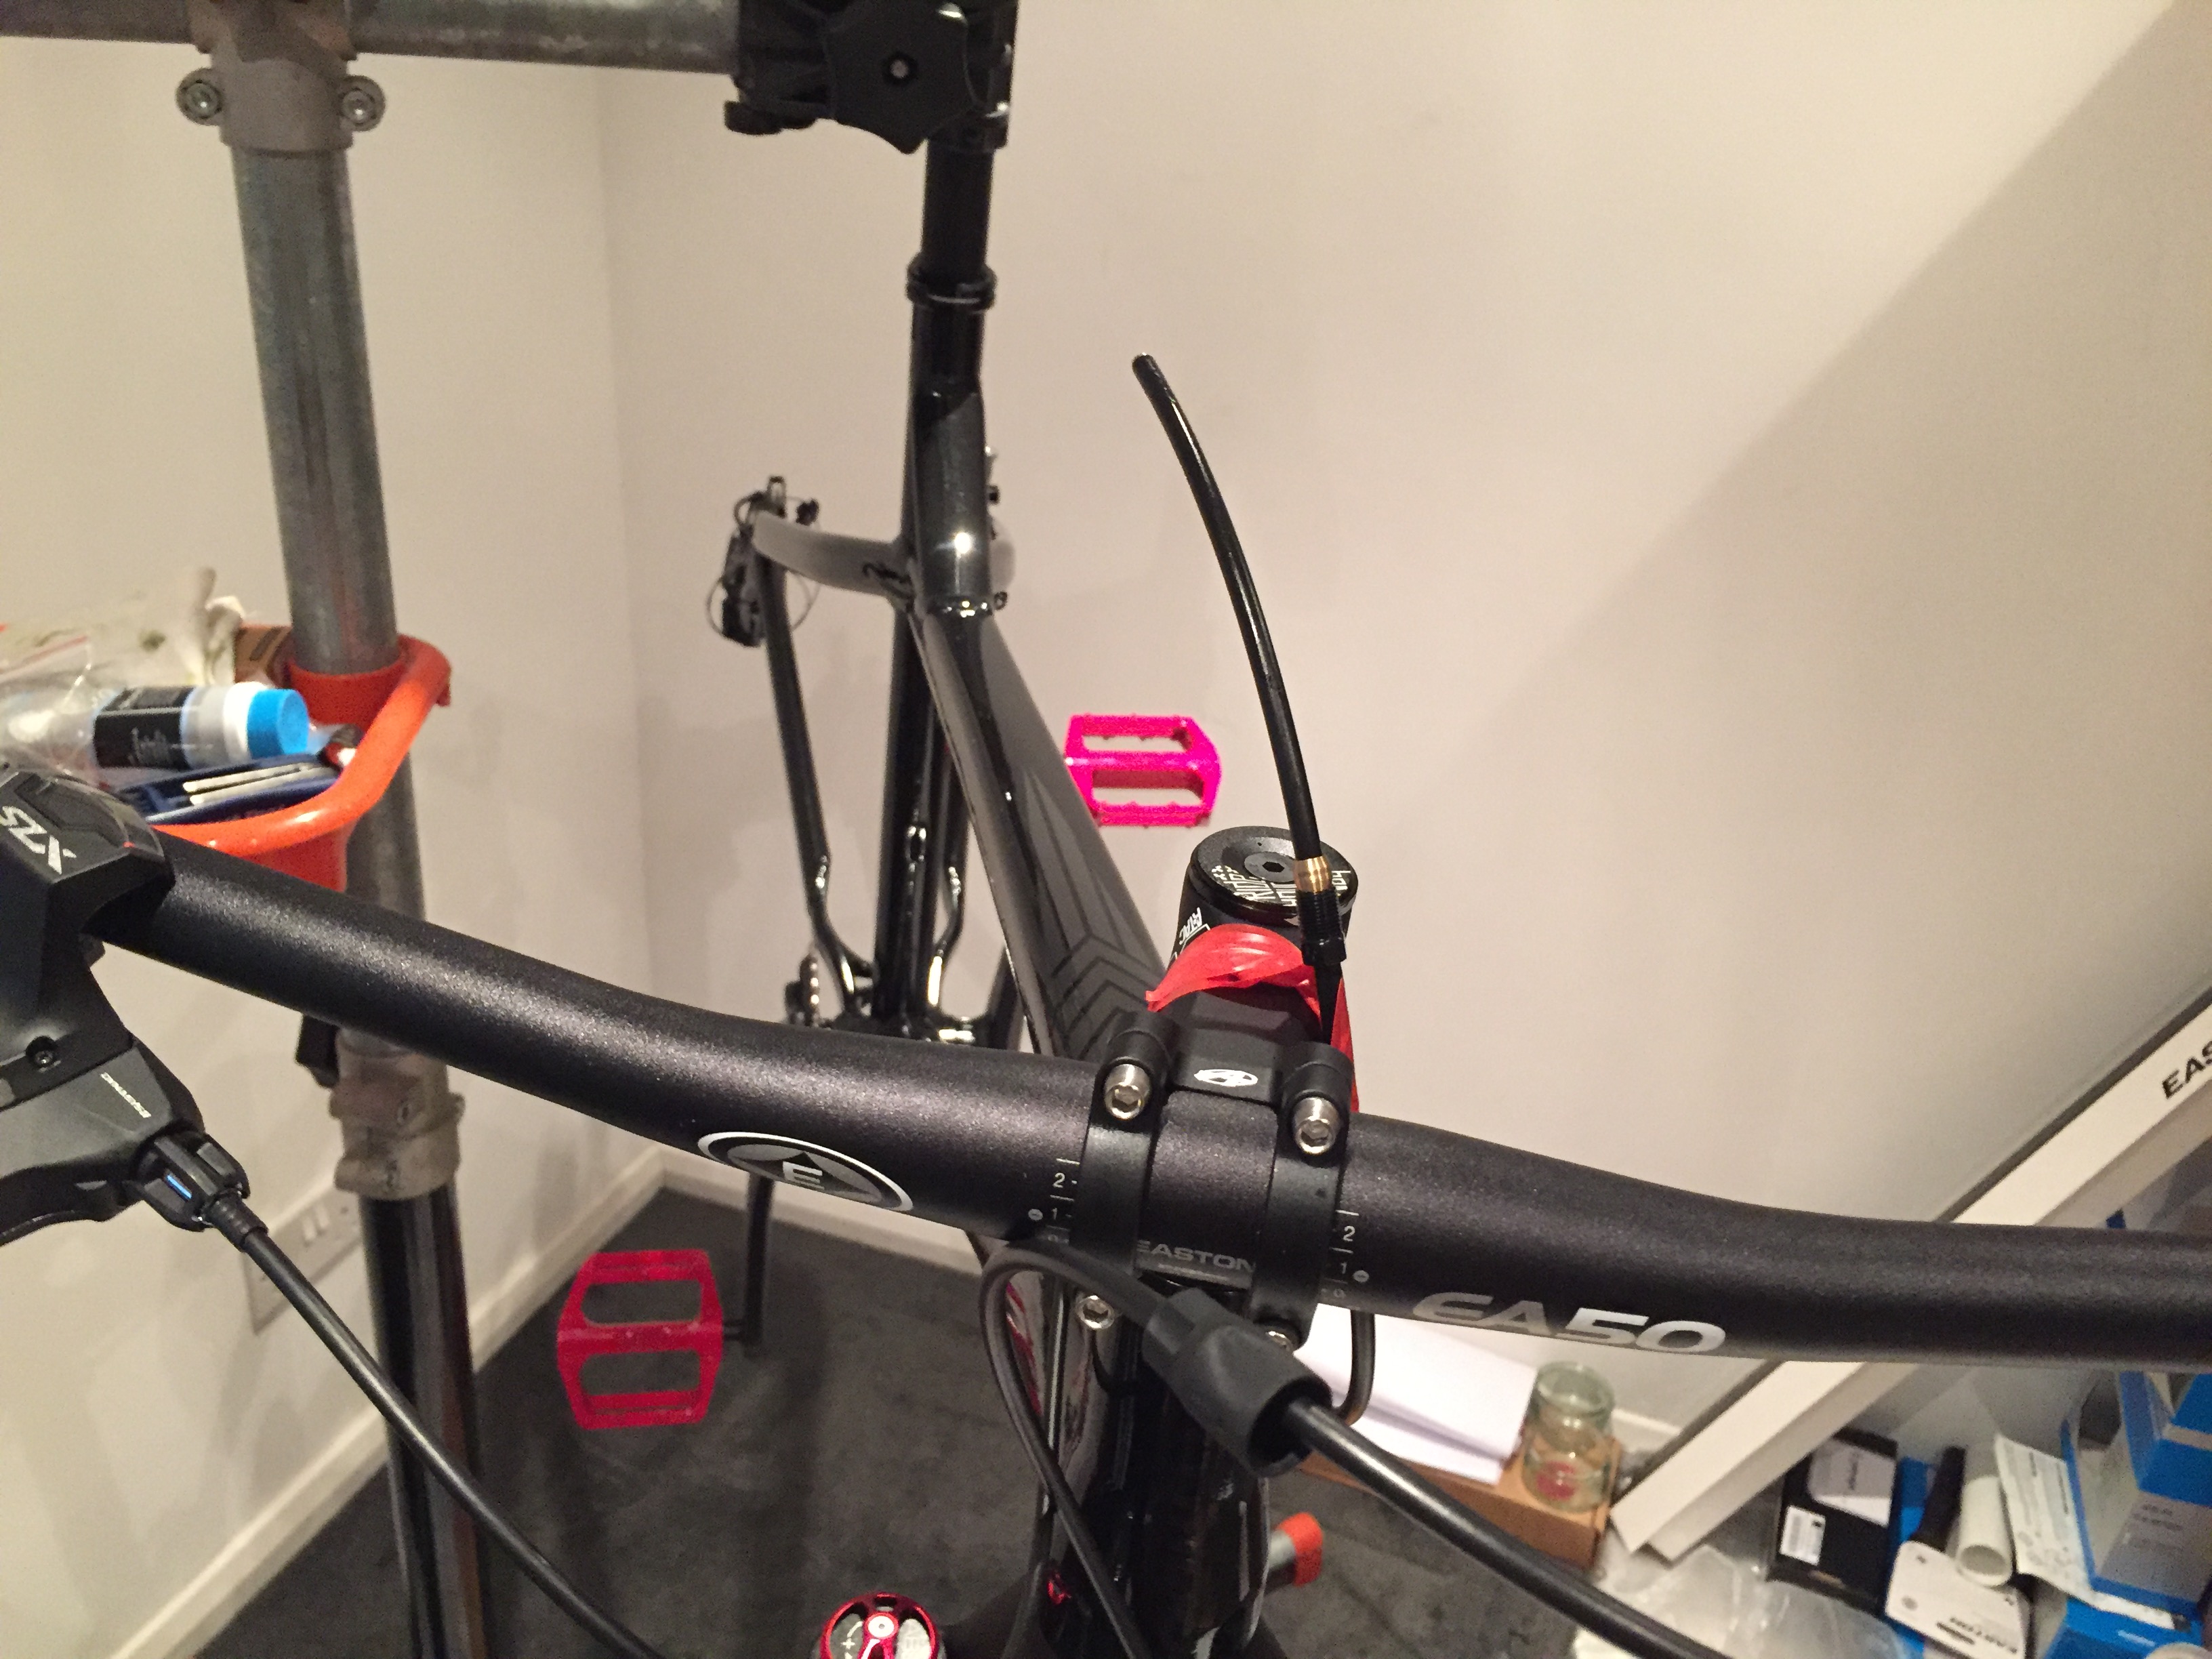
I managed to complete the swapping/shortening procedure without needing to bleed the brakes which was great news (following these guides which were incredibly helpful). I probably will eventually need a bleed kit, but I was pleased not to need it right away.
Completing the drivetrain
With the brakes finished, all that was left was to fit the chain and adjust the derailleur. I wasn’t sure about the largest cog plus two rule of thumb for nailing the correct chain-length given the one-by drivetrain, so I erred on the side of caution and ended up removing links twice.
This is where the one-by drivetrain started to pay off in its simplicity. Adjusting the derailleur is as simple as three different screws and then setting the cable tension, and there was only one to do. It’s basically knowing which screws do which, then little more than trial and error.
With the bike up in the stand going through the gears, my first impression was that the drivetrain was quite noisy. This was against the backdrop of my quiet house though, and when I took it outside for its maiden test-ride it was barely noisier than two- and three-by drivetrains I’ve ridden. The chain is obviously not “happy” in 1st or 11th gear but it pulls smoothly and doesn't “grind” or “clunk”.
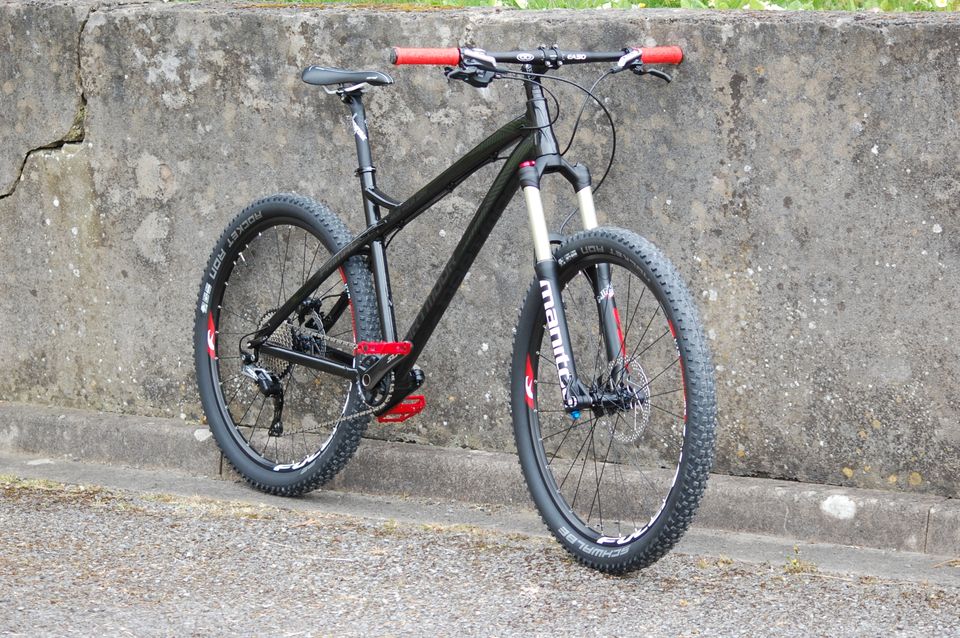
The result
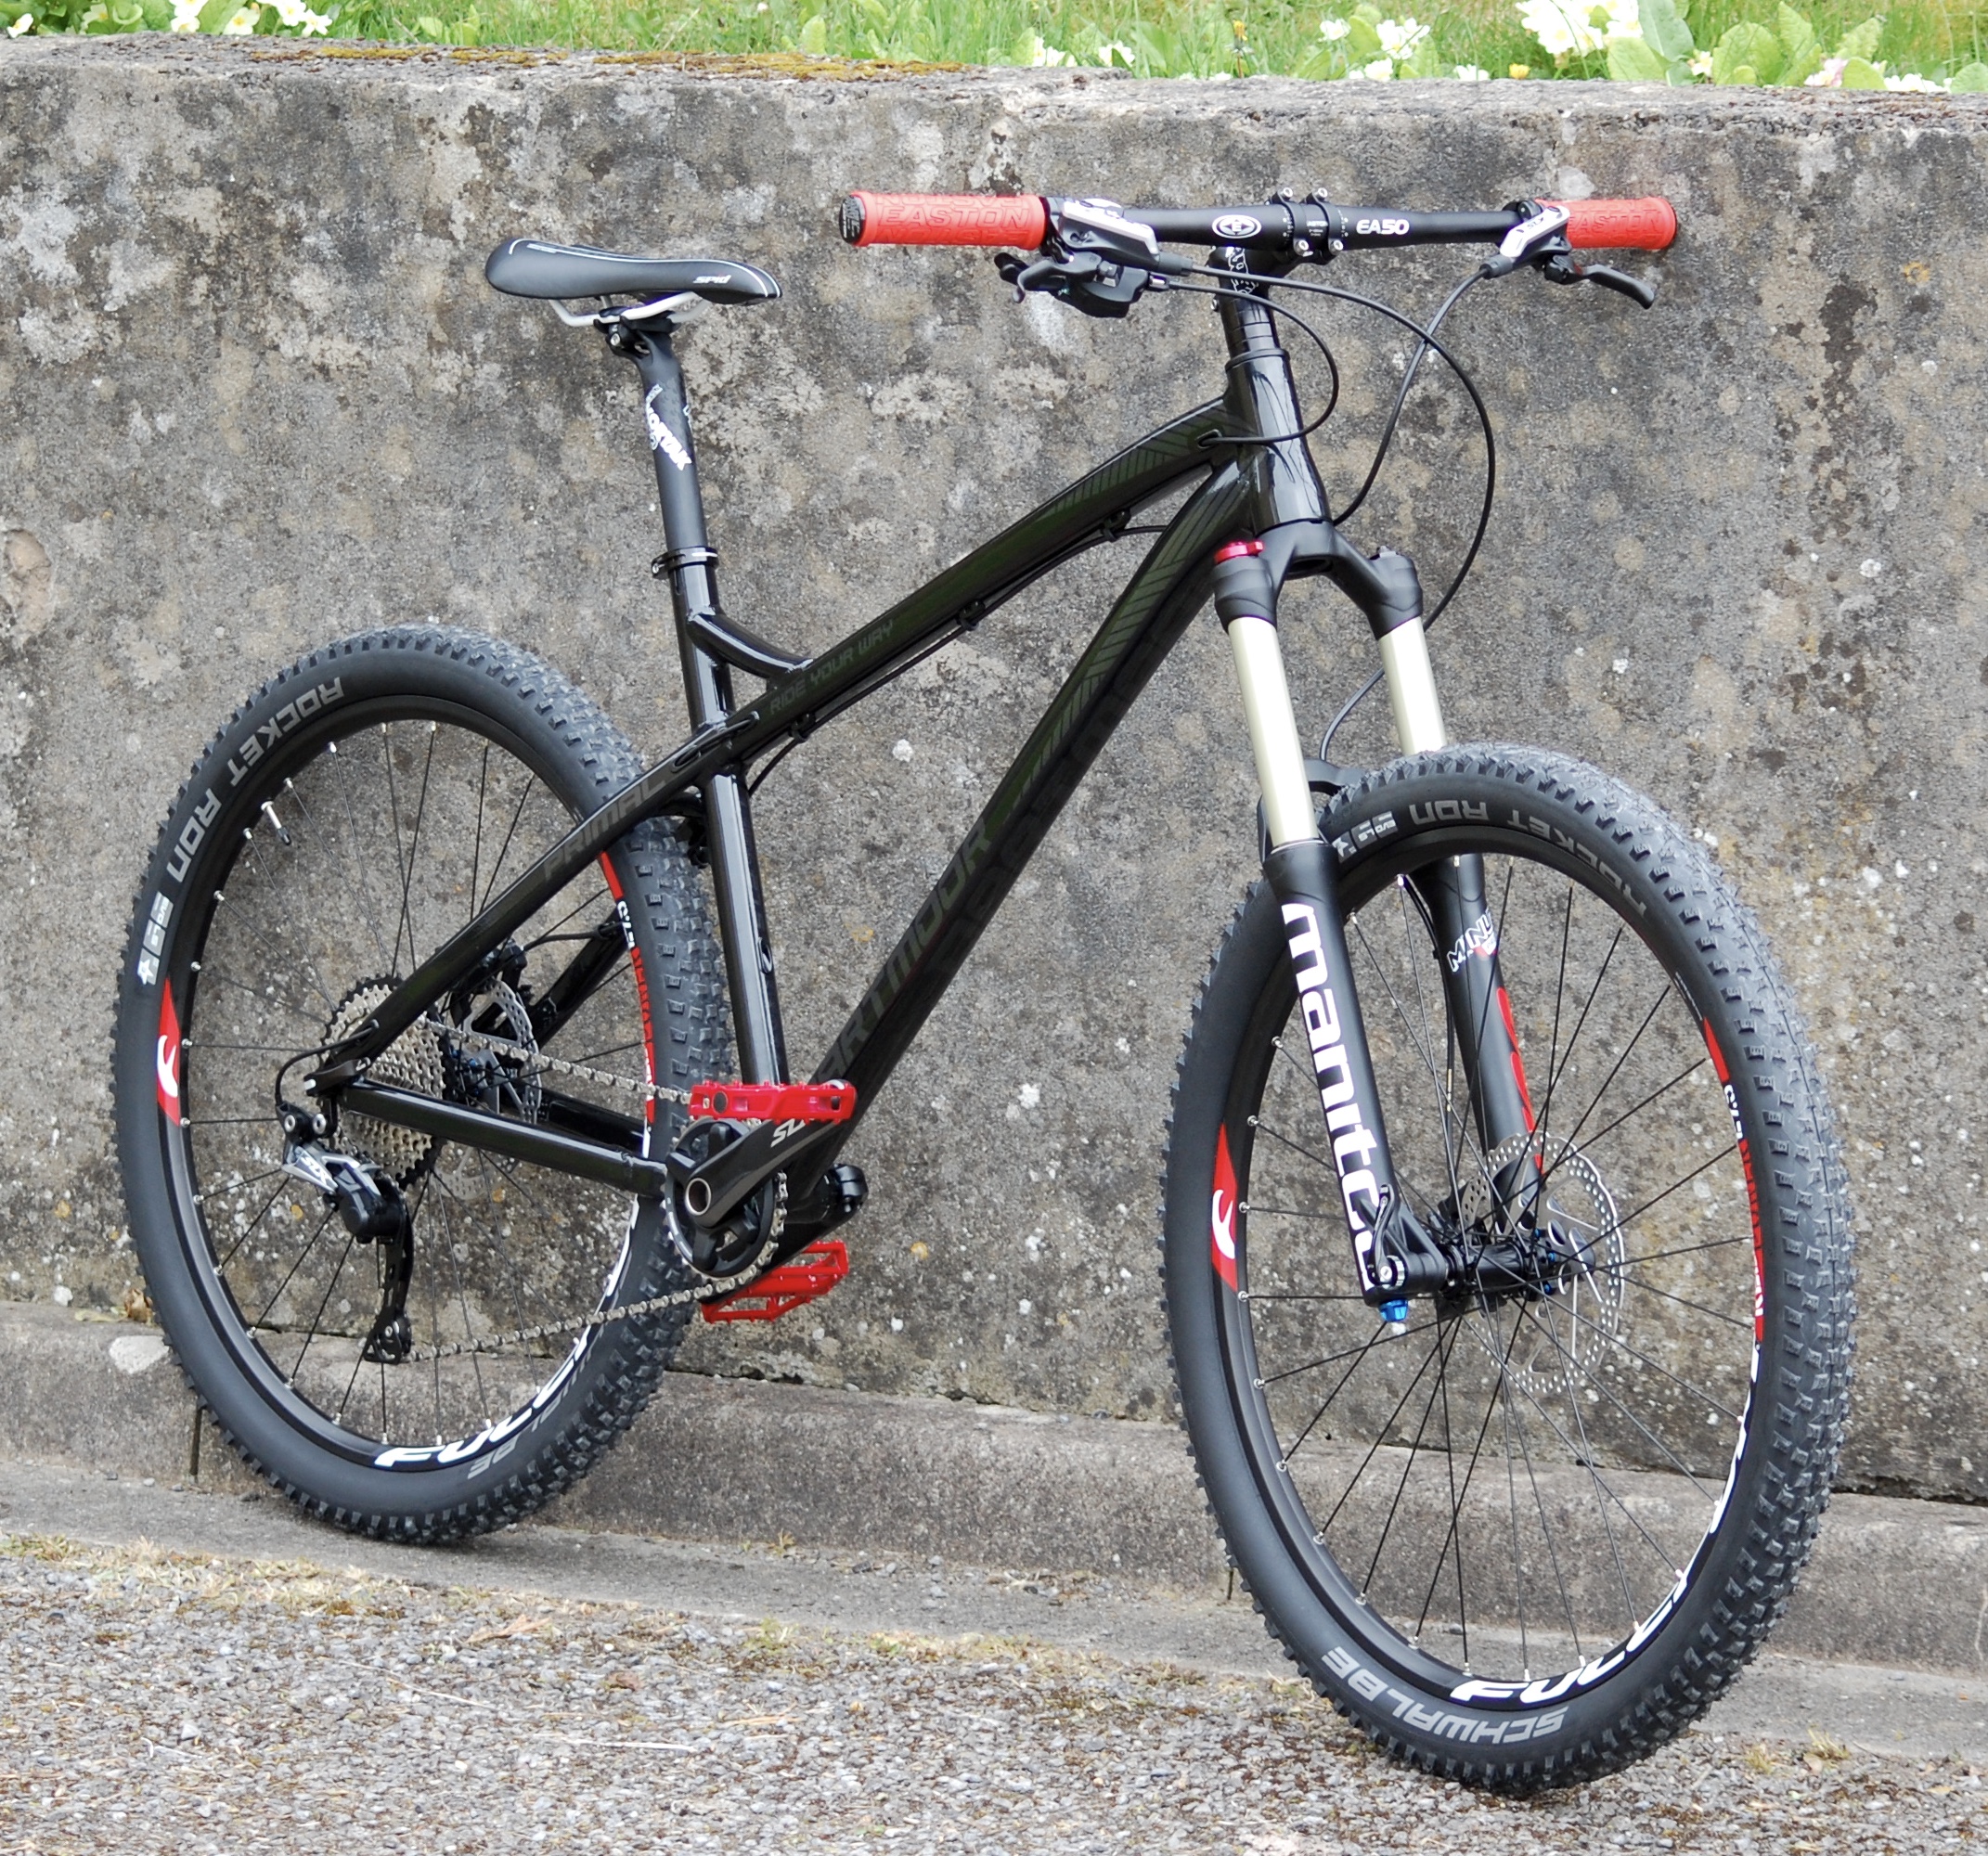
I’m really pleased with the look of the bike. It was clear after the first few parts that black and red had emerged as predominant colours. I managed to stick to that, making it feel like a curated set of components rather than random bits thrown together.
All it needs now is some mud!
The weigh-in
Using the failsafe method of standing on some scales with and without the bike, then subtracting the difference, it came in at 12.1kg. I was predicting somewhere around 12kg, so it was in-line with my expectations.
The most effective weight-saving would be to throw some money at a decent (potentially tubeless) wheelset, followed by the smaller (but lower end) parts I used: bars, seatpost, pedals. I'm totally happy with this weight for now though, and it comes in slightly below that of the pre-built bikes on my shopping list in the first post.
Parts summary
Purchases added in this post:
| Component | Price |
| Easton grips | £10 |
| Sram XX1 11psd chain | £19 |
| Shimano SLX M7675 brakes | £110 |
| Shimano brake mount adapters | £20 |
| Inner tubes | £7 |
Final bill
So the total damage was as follows:
| Frameset and forks | £523 |
| Groupset (inc. bottom bracket) | £247 |
| Brakeset (inc. mount adapters) | £150 |
| Wheels (inc. tyres/tubes) | £132 |
| Everything else (seatpost/stem/saddle/peddles/handlebars) | £76 |
| Discounts (vouchers!) | -£15 |
| Total | £1,115 |
Given my initial budget of £1k, this is clearly a little bit over… whoops ☺️ . Turns out it’s quite hard not to “push” the budget on every little component choice. 10% creep is pretty reasonable though and thankfully I’m in a position where I can afford it.
Thanks for reading if you got this far. I can’t wait to get some off-road mileage on this thing! Hopefully you enjoyed my waffling. At the very least, I hope you found this at least interesting or insight, or at most I maybe even helped inspire you to build your own bike? Let me know your thoughts (or just heckle me) on Twitter – I’m @bengourley.
Cheers!